Good lord, what have I created?! I really wanted to make something fun and different for Halloween this year, well for you guys to be able to make for Halloween that is, which is how this Ghostly Halloween Black Velvet Cake came to be. This cake went through so many stages of development over the week and I had so many messages over Instagram asking me when the cake would finally be finished and what I was going to do. I really wanted to make a creepy webbing over the top out of marshmallow but I wasn’t up for creating a mega sugar filled marshmallow, and xylitol doesn’t really create the stretch needed to make a gossamer-like web. So, that’s why this cake is a little mental and super messy to look at. Anyway, decorating isn’t really my forte and the centre of the cake is my favourite part because those layers are stunning!
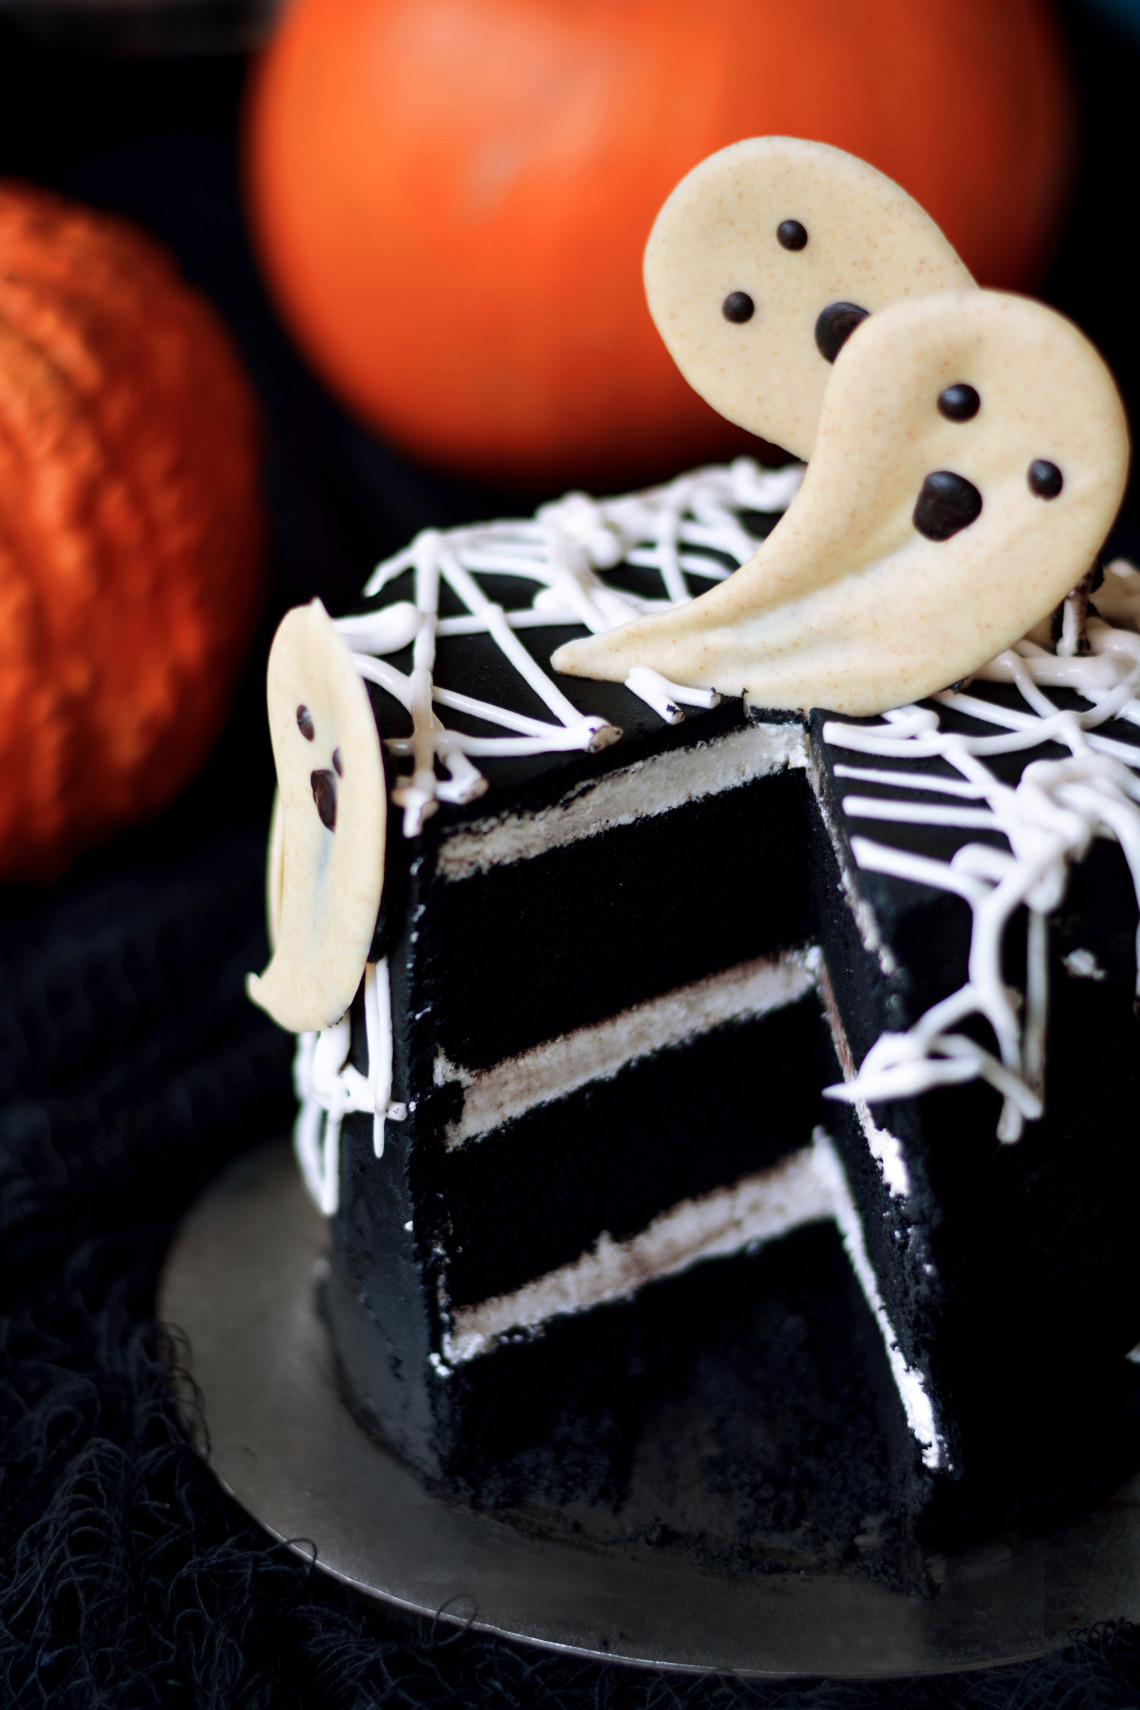
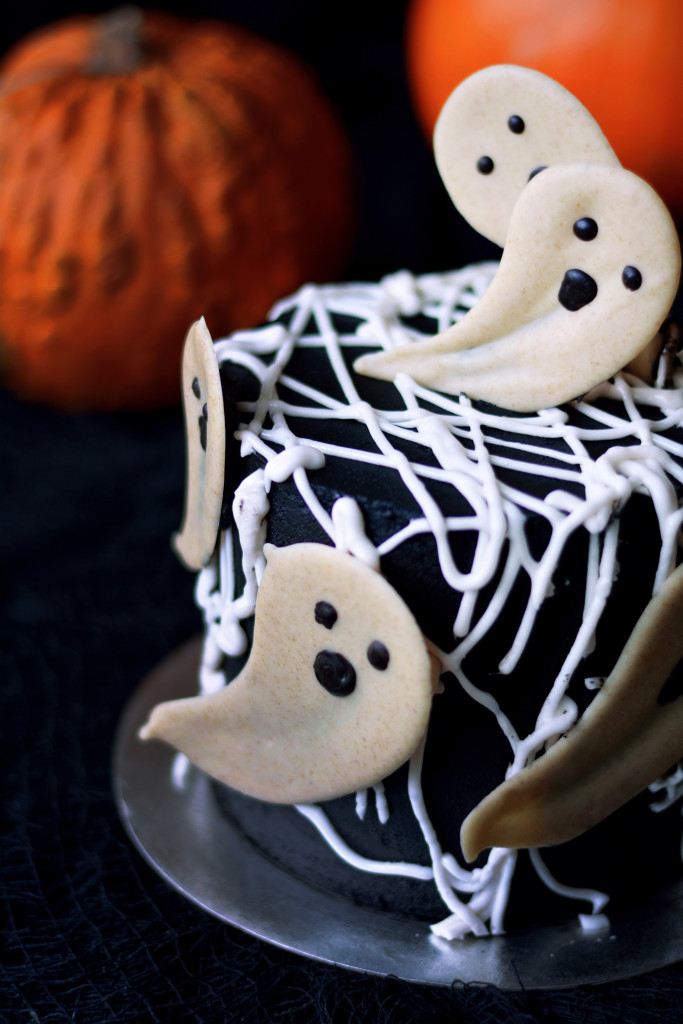
This Ghostly Halloween Black Velvet Cake is something dreams are made of. Devilishly delicious dark chocolate cake with silky raw vegan vanilla buttercream, vegan marshmallow webbing, and raw chocolate ghosties.
If I could sum up the taste of this cake it’s basically like a giant Oreo, if Oreo were a cake of course. It’s a rich chocolatey black velvet cake with a creamy vanilla faux buttercream frosting in the middle and a chocolate buttercream frosting on the outside. It’s wrapped in a chewy marshmallow webbing to add in a little bit of fun and a difference in texture. It’s a lot thicker than regular marshmallow as it’s only for decoration but my girls absolutely loved the stuff. The black velvet cake gets its colour from activated charcoal and Dutch black cocoa which is also what is in the beloved Oreo cookie. All of the acidity has been neutralised through processing giving the cocoa powder a really mellow and non-bitter flavour. It’s also pretty much black in colour making it best for creating super chocolatey flavours with a dark and spooky colour. Unlike most cocoa powders it pretty much doesn’t contain any fat so it can make baked goods a bit dry and crumbly. This is why I’ve used a simple syrup to soak through the individual cake layers when assembling.
And, moving on to assembly, I’m going to teach you how to create a perfect layered cake using acetate and a cake ring. Firstly you’ll bake your cake in a large rectangular tin, leave to cool completely then cut out 2 rounds using a 6″ cake ring and reserve the scraps for the base. Once your cake soak and buttercream are ready it’s time to get assembling. You’ll basically get a lined sheet pan and place your cake ring in the centre and place your acetate collar inside the ring. Then you’ll weigh out one of your rounds and then weigh out the same in scraps of cake. Then you’ll break them up a bit and throw them into the centre of your cake ring and knuckle them in gently until you create a nice even layer. After this, you’ll poke a few holes into your cake and douse in an ample amount of cake syrup to ensure it glues together and stays moist. Then just pop on a layer of buttercream, followed by cake, repeat the syrup dousing and buttercream then add the next cake layer and repeat again. It’s actually really easy and honestly, I find it much easier than trying to level out cakes and getting my buttercream even. I’ve even tried this method on raw vegan cheesecakes and it works a dream.
I wanted to keep this post extra short and sweet as the recipe is a long one. Just be sure to read it over and over again, print it out, make notes and be comfortable with the whole thing before attempting to give it a whirl, give yourself 2 or 3 days before Halloween to make this and have it stored in your fridge ready to go. The ingredients for the buttercream are really precise as a bit of science has had to go into it all, but for the rest of it don’t worry if you’re getting the old cups out for ease. It may look complicated but in reality, it really isn’t. The hardest part is the marshmallow webbing which will solidify quickly so work fast to get it into your piping bag. Oh, and it will spray out like silly string so if you’d rather create some fat marshmallow ghost blobs on top of the cake then do that. Make this cake your own, I’ve just given you the tools to do so.
Most importantly have a super fun Halloween. I’ll be leaving notifications on over the Halloween period so if you get stuck drop me a comment an I promise I’ll get back to you ASAP! Looking for more Halloween recipe inspo? Check out my Ghostly Halloween White Chocolate Apples, Paleo Candy Corn, and Healthy Starbucks Caramel Apple Spice Drink. Oh, and to keep up to date with my deliciousness sign up for my newsletter and I’ll love you forever – who am I kidding? I already do!
- 2 cups/300g coconut sugar
- 2 cups/200g almond flour
- 1½ cups/187.5g Dutch black cocoa
- 1 cup/100g arrowroot/tapioca flour
- ⅔ cup/75g coconut flour
- 1 tbsp baking powder
- 1 tsp sea salt
- 6 medium eggs (if vegan see notes)
- 1½ cups coconut milk
- 1 cup water
- 1 tbsp apple cider vinegar
- 1 tbsp vanilla extract
- ½ cup/115g coconut oil (melted)
- ¼ cup/35g activated charcoal powder
- ½ cup/100g xylitol (or all coconut sugar)
- ¼ cup/40g coconut sugar
- 1 tbsp Dutch black cocoa
- ½ cup cooled brewed coffee or cold water
- ½ tbsp vanilla extract
- 192g coconut oil (melted)
- 92g cacao butter (melted)
- 110g cashews (soaked overnight, drained, and rinsed)
- 80g agave nectar
- 50g water
- 2 tbsp vanilla extract or 1 tsp vanilla powder
- 1 tbsp lemon juice
- 6g/2 tsp inulin
- 1 tsp sea salt
- 400g xylitol (powdered)
- 450g of white buttercream frosting
- ½ cup/ 62.5g Dutch black cocoa
- ¼ cup plus 2 tbsp/52.5g activated charcoal powder
- 1 tbsp plant milk
- ¼ cup aquafaba
- ¼ tsp xanthan gum
- Pinch cream of tartar
- 1 cup/200g xylitol
- 2 tbsp agave nectar
- ½ cup water
- Generous pinch sea salt
- 20g
agar agar powder (not flakes!) - ½ cup cold water
- 40g xylitol
- 25g cashews
- ½ tsp inulin powder
- ¼ tsp sea salt
- 40g cacao butter (melted)
- 20g dark chocolate (melted)
- ¼-1/2 tsp activated charcoal
- Grease and line a 9" x 13" (34.2cm x 24cm x 5.9cm) rectangular cake tin with parchment paper. Pre-heat your oven to 180°C/160°C fan/350°F/Gas Mark 4.
- Combine your coconut sugar, almond flour, black cocoa, tapioca flour, and coconut flour, baking powder, and sea salt into a large mixing bowl. Using a whisk stir together your flours until fully combined. Place your eggs, coconut milk, water, apple cider vinegar, vanilla extract and melted coconut oil into your stand mixer bowl and whisk until light and frothy. Carefully sift in a cup at a time of your flour mixture until fully combined then whisk in your activated charcoal. (If using vegan egg substitutes see notes.)
- Pour into your lined cake tin and bake for 30-40 minutes until a skewer comes out clean. Remove from the oven and leave to cool completely in the tin. Once cool turn out onto a silicone baking mat or some parchment and using your 6" cake ring cut out 2 rounds. Weigh one round and reserve the same weight in cake scraps. Store your cake wrapped in cling film or wax wrap in an airtight container in the refrigerator until needed.
- To make the cake syrup combine all of the ingredients into a heavy bottomed medium sized pan and place onto a low-medium heat. Stir a few times and leave on the heat until it just comes to a boil. Remove from the heat and leave to cool completely before refrigerating, preferably in a squeezy bottle!
- Next it's time to start on your buttercream. Add your melted coconut oil and cacao butter, along with the remaining ingredients (except for the powdered xylitol) into the bowl of your food processor and pulse a few times before blending until smooth. Be sure to scrape down the side periodically to ensure that everything is fully combined. Transfer to a bowl, cover, and refrigerate until solid - this could take up to 4 hours. Remove from the refrigerator and break up into small pieces with a spoon or butter knife. Add to your stand mixer and mix on high until fluffy and light. Gradually sieve in your xylitol until smooth. The frosting will be ready when it is just about sticky enough that only some of your finger is coated when you dip it in, not the whole finger. Divide your frosting into 2 halves, place one half into an airtight container and place into the fridge. Dividee the remaining half of the frosting into 3 equal parts - roughly 150g for each 3rd.
- Take a clean 6" cake ring and place it onto the centre of a cake board or sheet pan lined with parchment. Place 1 strip of acetate into the inside of the cake ring to line. Place your cake scraps on the inside of the ring and use the back of your hand and fingers to merge the scraps together and create a flat, even layer. Poke in a few holes across the cake and pour over a little cake syrup. Leave to soak in then using the back of a spoon spread over ⅓ of your frosting into an ever layer.
- Using your index finger gently tuck the 2nd piece of acetate between the cake ring and the top ¼" of the 1st strip of acetate. Drop in your next layer of cake and repeat the cake soak and frosting. Add the final cake round and repeat the process once more. Place into the freezer for 4 hours until firm.
- Whilst you're waiting for your cake to firm up you can make your raw chocolate ghosts. Place your xylitol, cashews, inulin powder, and sea salt into a bullet style blender and blend until powdered. You may have to repeat this process a few times. Stir into your cooled, melted cacao butter then return to the blender and blend again until smooth. Leave to cool until cooler than room temperature and the consistency is thick enough to spread. Line a baking tray with parchment then drop a tablespoon of mixture onto the sheet and using the back of a spoon or a pastry brush, brush the chocolate outward to create a ghost shape. Repeat until all of the mixture has been used up. Place into the refrigerator until set. Mix together your melted dark chocolate and activated charcoal powder until smooth. Using the end of a small round piping tip dip into the melted chocolate and carefully blob on eyes and mouths onto your ghost. Refrigerate until needed.
- It's now time to remove your cake from the freezer and the cake ring. Using your fingers and thumbs push the base of the cake out of the cake ring then gently peel off the acetate and transfer the cake to a cake board and cake stand. Leave to defrost in the refrigerator completely, this will take about 3 hours.
- Whip your remaining buttercream in your food processor until smooth and the right consistency then sift in your black cocoa and activated charcoal until smooth. Add a tablespoon of milk if the consistency is too thick. Coat your whole cake in a thin layer of buttercream to create a smooth surface for your remaining buttercream. Chill for 30 minutes until firm then add a fresh layer of buttercream and spread evenly using an offset spatula. Use a cake scraper to smooth out the frosting around the sides and tops then chill for a further 30 minutes. Be sure to reserve about ¼ cup of frosting to stick on your raw chocolate ghosts with.
- Don't worry, you're almost there. It's now time to make your marshmallow. Add your aquafaba, xanthan gum and cream of tartar to your stand mixer and mix on high until stiff peaks form. Next add your agar agar to ½ cup of water, mix, and set to one side. Place your xylitol, agave, water, and salt in a heavy bottomed medium sized pan and place onto a low-medium heat. Bring to a boil and boil for 2 minutes. Whisk in your agar and boil for a further 1 minute, stirring continuously. Turn on your stand mixer on a slow speed then gradually drizzle in your agar mix. Whisk on high until light and fluffy and cool to the touch.
- Remove your cake from the refrigerator and fill your piping bag the marshmallow. Using a small round tip go wild like you would with a can of silly string and let loose all over the cake. A turntable really comes in handy here! Trim the excess marshmallow around the base of the cake if you wish. Next slather a little buttercream onto the backs of your ghosts and glue onto the cake wherever you feel is best.
- Refrigerate until you are ready to serve. Consume within 1 week when stored in the refrigerator in an airtight container.
Stand mixer or decent hand mixer
9" x 13" (34.2cm x 24cm x 5.9cm) rectangular cake tin
6" cake ring
2 strips of acetate, each 3 inches wide and 20 inches long (I used 10cm x 10cm x 125micron acetate cake collar which works well.)
9" cake board
Cake scraper
Piping bag and fine round piping tip such as the Wilton #1/#2 tip
Vegan egg substitutes:
If vegan use 3 flax/chia eggs in the batter then whisk 9 tbsp of aquafaba until stiff peaks form and fold in at the end before pouring into the tin. This will give the mixture an airy texture. 1 chia egg = 1 tbsp milled chia plus 3 tbsp water that has been left to gel for a few minutes.
*All cup measurements used are UK cup measurements and so 1 cup = 250ml, 1 tbsp=15ml, and 1 tsp=5ml. Please note that prep time is largely freezing/setting time.


1 Comment
tessadomesticdiva
23rd October 2018 at 1:39 pmHoly Moses, this is a stunner! The charcoal is SUCH a cool addition, loving it, and that color!!! I have never cooked with charcoal before, I’ve got to try this!