
It was my daughter’s 13th birthday back in February and so I wanted to make her something super special. As one of her birthday present requests was a unicorn onesie I thought a Raw Vegan Unicorn Cake would be the perfect challenge. And a challenge it certainly was. Last year I was lucky enough to receive a discount on an Excalibur 9-Tray Dehydrator from the wonderful people over at Sous Chef and I seriously could not be more grateful – I’ve made a couple of raw vegan cakes (and donuts) using it and they make a refreshing change from a raw cheesecake. I have never tried to ice/decorate one though. Anyone that knows me well will know that I am utterly useless when it comes to cake decorating. Especially piping. And, I own like the world’s smallest and dumbest piping set which I’m guessing is for cupcakes. Yes, I am that bad that I don’t even know what it’s for! So as you can imagine once I had set myself this task the panic had set in.
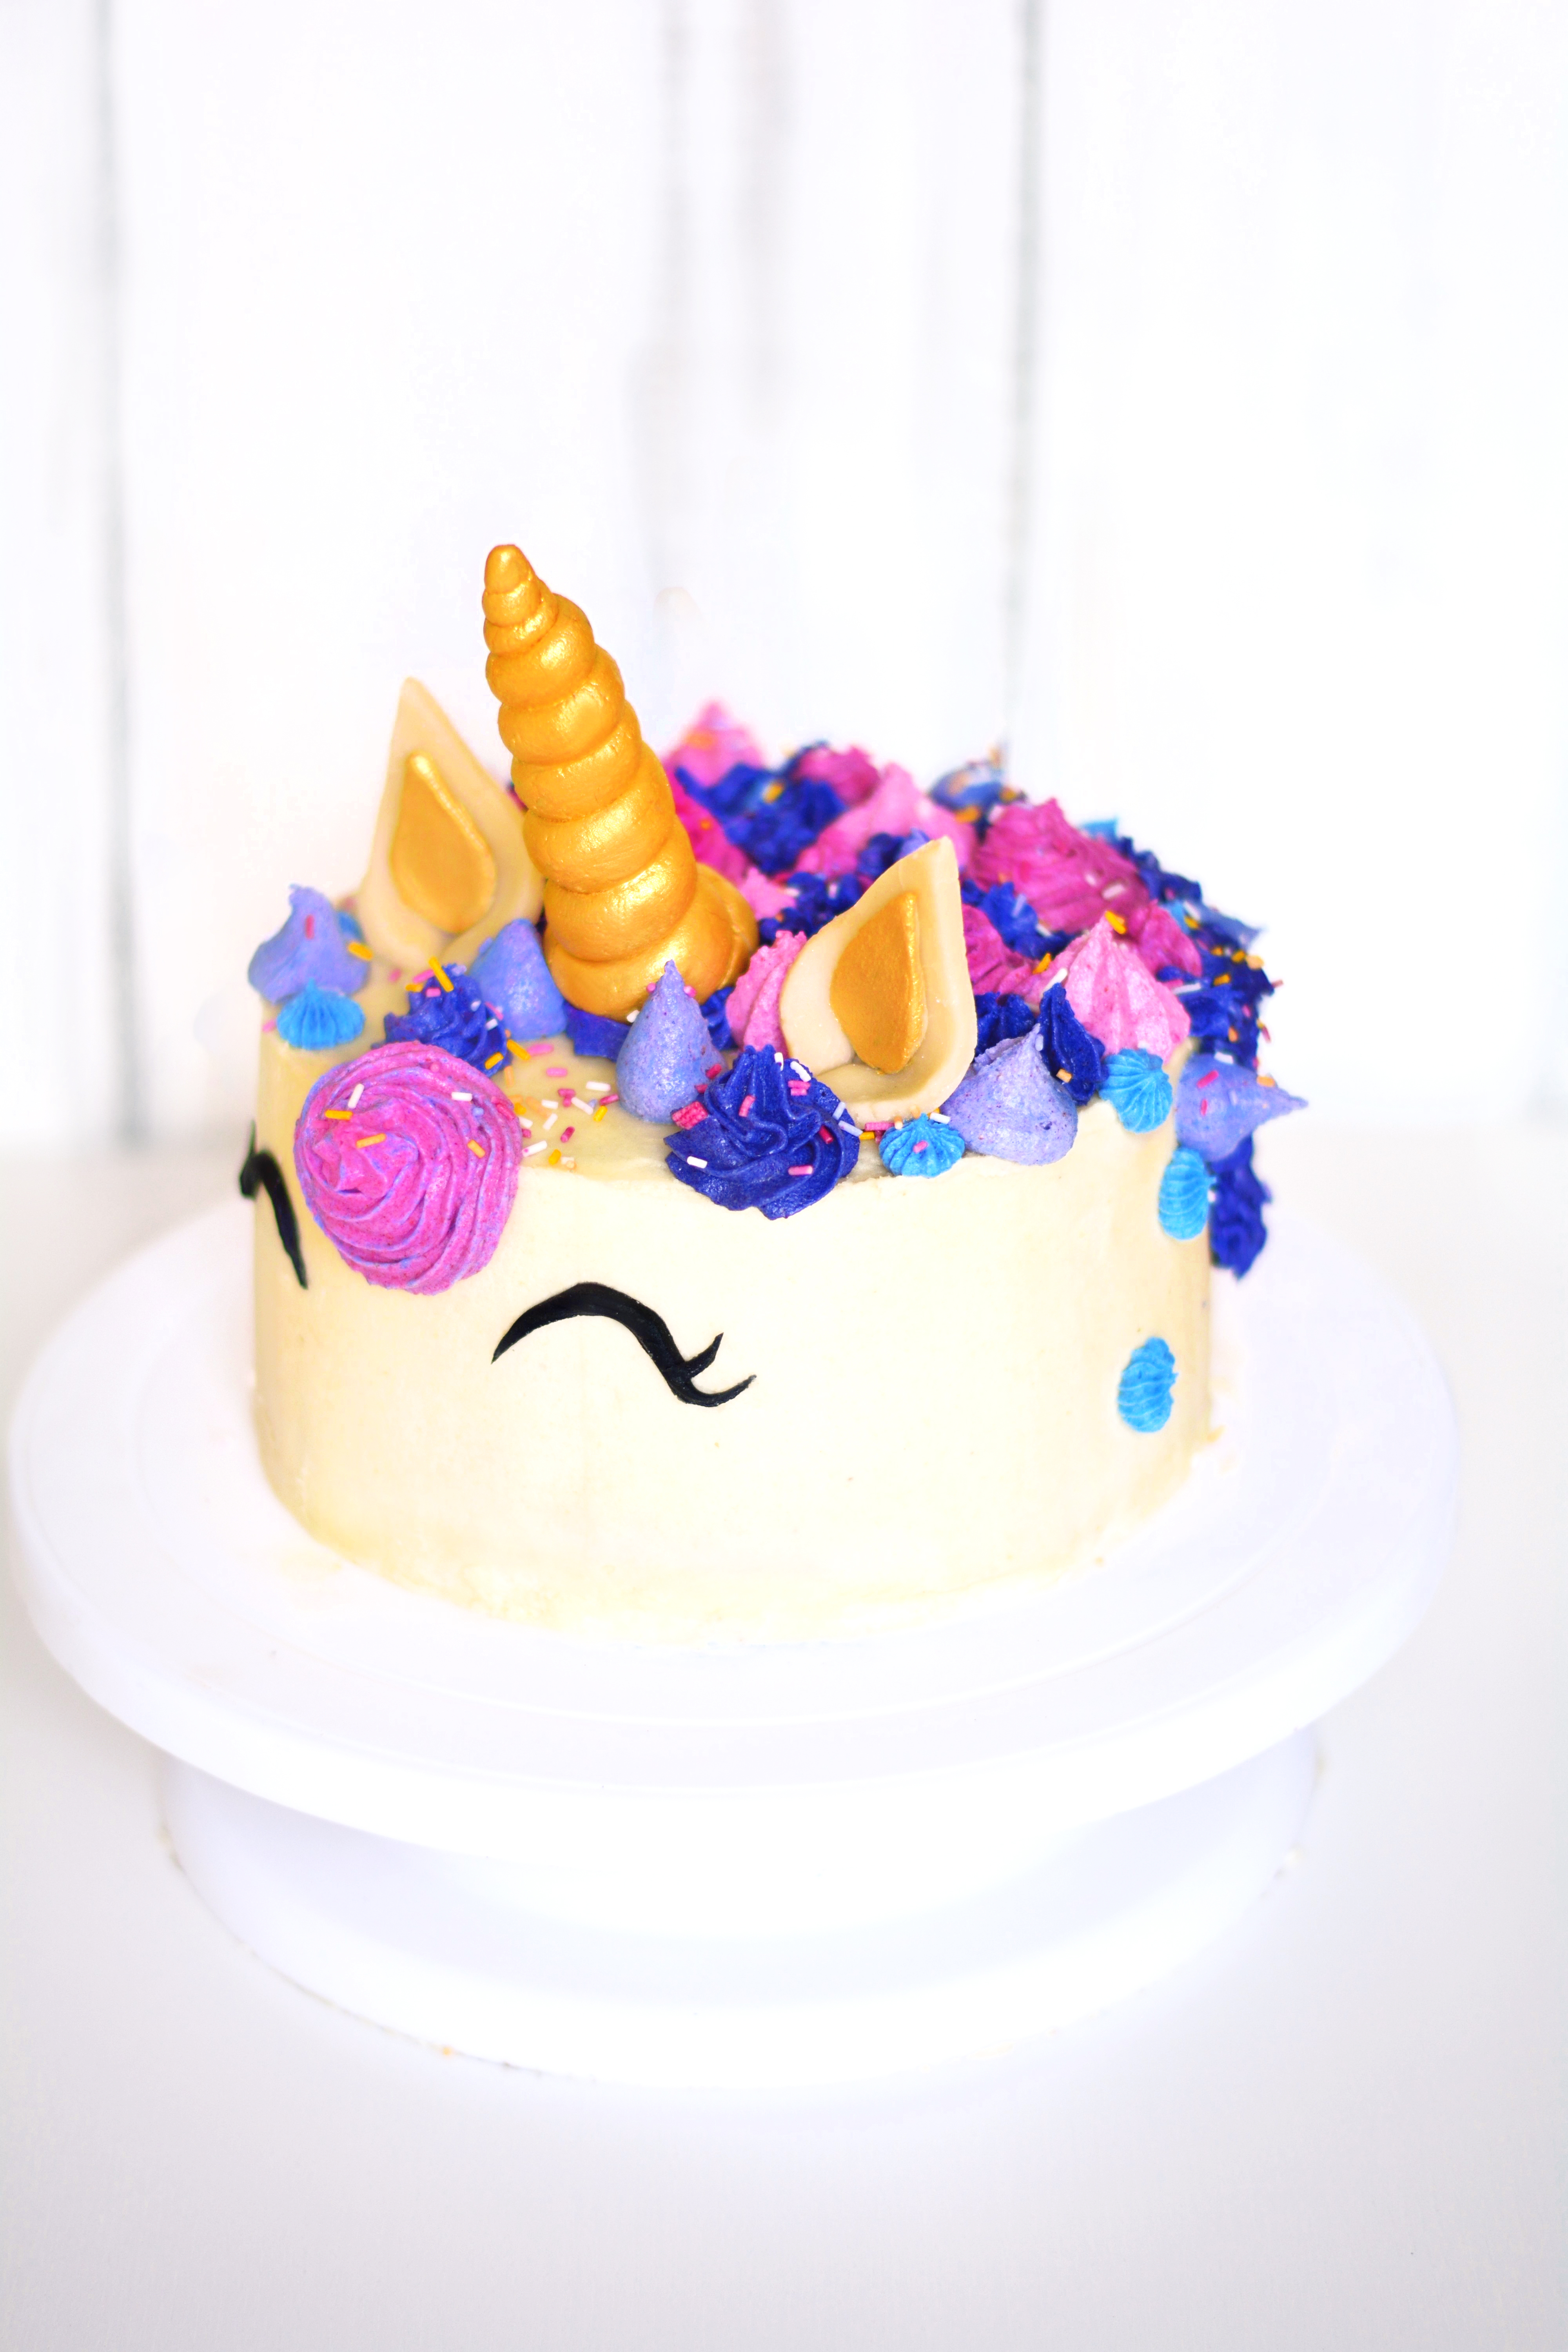
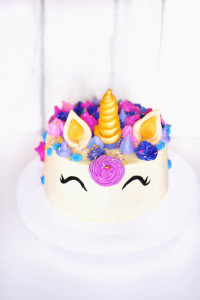
This Raw Vegan Unicorn Cake will blow your socks off! Raw vanilla and pitaya sponge with lashings of vegan buttercream and fondant. Magical!
For the actual cake itself, I made a vanilla and pitaya sponge which I adapted from the super talented Amy Levin’s Mini Coffee Crunch Layer Cakes – who if you don’t follow by the way, then you better had like RIGHT NOW! Her stuff is insanely good and I’ve learnt so much over the past couple of years from your online courses and website. The sponge is made using a variety of flours and nuts and also psyllium husk to give it that springy feel. It’s much easier than making a regular cake because you can simply mix everything together and throw it into the dehydrator then come back when it’s ready and get frosting. It has a very similar texture to regular cake and is much lighter on your stomach – not to mention more nutrient dense of course! I didn’t manage to snap a picture of the inside of the cake due to all the birthday fun but I used the pitaya powder to create an ombre effect throughout the layers. You can do this or you can throw in the whole lot to make a nice pink coloured cake. In hindsight I kind of wish I had done this to save time!
Although I adapted Amy’s fab sponge recipe I decided to make up my own raw vegan buttercream frosting and a vegan fondant icing to shape the unicorn horn and ears. Those two tasks alone filled me with the utmost dread so I sat down and crafted the recipes, then watched about 5000 different YouTube videos on piping techniques and of course how to design a Unicorn Cake. The tutorial I found most useful was one from Cakelyn’s Finest which you can watch here. And I highly recommend that you do unless you’re some sort of cake wizard (unlike myself). The buttercream was coloured using a combination Raw Nice’s Blue Spirulina and Pitaya Powder. I haven’t included any exact amounts for you to use as I was losing my mind in the kitchen but you can just mix the two together to create various shades of blue, pink, and purple. Be sure to use a little at a time as they are very vibrant – I tend to work in 1/4 teaspoon increments. If you want to make the buttercream extra tasty then try adding a tablespoon of freeze-dried blueberry, strawberry, or raspberry powder and a few drops of similar flavoured Medicine Flower Extracts.
The only things that aren’t technically raw on this cake are the unicorn horns and ears as you have to cook the fondant slightly at the beginning, and of course the few sprinkles I threw over the top. If you’re on the lookout for some amazingly vivid vegan sprinkles then check out Fancy Sprinkles – I’ve not tried them yet (the perils of being a broke food blogger) but they have some awesome colours going on and modern shapes too! I painted both my unicorn horn and ears with edible gold lustre dust too but if you want to be strict Paleo then just pop some of the fondant in the food processor with a small amount of turmeric until you get the shade of yellow you love. I also used activated charcoal (you can grab this from Raw Nice) to colour a small amount of fondant for the eyes. Just remember that decoration is a really personal thing so please just make this cake your own and don’t try to mimic exactly what I did! You’ll find it a hell of a lot less stressful and will have far more fun doing your own thang.
Are you a self-professed unicorn addict like my daughter? Then why not try my Healthy Unicorn Frappuccino or Fermented Unicorn Zebra Cheesecake? Oh, and if you want to keep up to date with my deliciousness and awful sense of humour then why not sign up for my newsletter whilst you’re at it?!
- 250ml nut milk or water
- 30ml/2 tbsp coconut oil (melted)
- 150g maple or coconut sugar
- 150g cashews (soaked for 2 hours, rinsed)
- 50g mesquite/lucuma powder
- 30ml/2 tbsp vanilla extract or ½ tsp Madagascan vanilla powder
- 2 tbsp plus 1 tsp Raw Nice freeze-dried pitaya powder
- ½ tsp sea salt or ¼ tsp fine Himalayan pink salt
- 40g psyllium husk (not powder)
- 90g sprouted buckwheat flour/gluten-free oat flour
- 170g ground almonds
- 30g coconut flour
- 100g cashews (soaked overnight, rinsed)
- 50ml water
- 1 tsp/5ml lemon juice or apple cider vinegar
- 70g coconut oil (melted)
- 70g cacao butter (melted)
- Pinch sea/Himalayan pink salt
- 200g raw cane sugar/xylitol with 1 tbsp arrowroot starch, powdered
- 1-2 tbsp milk
- Up to 2 tbsp Raw Nice freeze-dried pitaya powder
- Up to 2 tbsp Raw Nice blue spirulina
- Your favourite natural flavouring or Medicine Flower Extract (optional)
- 250g raw cane sugar/xylitol with 1 tbsp arrowroot starch, powdered
- ¼ cup cold water or 2 tbsp coconut cream plus 2 tbsp water
- 1.5 tsp/7.5ml agar agar powder (not flakes)
- 2 tbsp light agave nectar
- 2 tsp plus ¼ tsp (11.25ml) coconut oil
- 1 tsp favourite natural flavouring or Medicine Flower Extract (optional)
- More arrowroot starch for rolling
- Gold edible lustre dust
- Vanilla extract or water (to mix lustre dust)
- Up to 1 tsp Raw Nice activated charcoal powder
- Start by making your raw sponge. Blend together your nut milk, melted coconut oil, coconut sugar, soaked cashews, mesquite, vanilla, salt, and pitaya powder until smooth. Pulse in your psyllium husk followed by the remaining ingredients until well combined. Scoop out the mixture into a mixing bowl and place into the refrigerator for 5 minutes until the dough firms up. Divide the dough into 6 equal portions. (I used weighing scales for this!)
- Take a silicone cake mould, like this one, and sprinkle the bottom with cold water. Place one of your dough bowls into the mould and knuckle it in until level. Place into the freezer for 5 minutes then carefully tip out the sponge layer directly onto your mesh dehydrator tray. Repeat until all 6 layers are moulded. Dehydrate at 115°F for 10-15 hours until firm on the outside but soft on the inside.
- Whilst your cake is dehydrating you can now start making your buttercream base. Take your soaked cashews, water, lemon juice, melted cacao butter and coconut oil, and your sea salt and blend until smooth. Transfer to a silicone mould or just a bowl and leave to set for 4-6 hours. Once set leave at room temperature.
- Next, it's time to whip up that vegan fondant icing! Place your
agar agar and your water/coconut cream in a small saucepan, give a quick whisk to combine and leave for 10 minutes in order to let bloom. Heat on low, whisking frequently until dissolved and slightly thickened. If you have lumps make sure you strain the mixture. Working quickly add your light agave nectar, coconut oil and any flavourings you wish. Heat for 1 minute until dissolved, whisking frequently. Once you see small bubbles beginning to come to the surface remove from the heat. Add 1 sieved cup of powdered sugar to the bowl of your stand mixer and scrape in theagar agar mixture quickly. Using a beater attachment beat on slow before bringing the speed up to the maximum. Gradually sieve in ½ cup of powdered sugar at a time repeating the process of beating on slow to high. Lightly grease with coconut oil then wrap in a layer of cling film. Let rest in the fridge for a couple of hours. (Bring to room temperature and knead well before use.) - Once your buttercream base has set and all of your cake layers have dehydrated it's time to whip up the buttercream. Place your buttercream base into a stand mixer with a beater attachment. Beat until pale and smooth and at room temperature. Gradually sieve your powdered xylitol and adding only a small amount at a time until the mixture is smooth and fluffy. Add a dab of buttercream onto a cake board or cake stand and add the first cake layer. Using an offset spatula add a layer of buttercream, smooth out, then add another cake layer and repeat until all layers are filled. Next, add a thin layer of buttercream around the outside to fill the grooves between each layer. This thin layer will trap the cake crumbs for a neater finish. Chill for 30 minutes until firm. Add a fresh layer of buttercream using your offset spatula then use your cake scraper to smooth out the frosting
around the sides and top. Chill for a further 30 minutes. - Divide your remaining buttercream into ⅚ different bowls and add in varying amounts of blue spirulina and pitaya powder until you reach the colours you want, then add your flavourings. Transfer to a piping bag with the nozzle of choice and get decorating your mane. Once piped, chill until you're ready to add your finishing touches.
- Take your room temperature fondant icing and either knead until malleable or place into a food processor to speed things up. Reserve some fondant for your eyes and ears. Taking an ample amount of fondant roll out into a tapered sausage. Using a damp skewer twirl the tapered fondant around the stick wrapping the thinner end at the top and the fatter end at the bottom. Leave your horn and ears to harden for 10 minutes.
- Cut out 2 heart shapes and 2 smaller teardrop shapes to make your ears. Dab a little water onto one of the hears and place the teardrop shape on top with the rounded edge at the top of the heart's peak. Repeat and gently
round both ears by moulding around a rolling pin or just carefully use your fingers to do so. - Mix a little of your gold lustre dust to a small bowl or cup then mix in a little vanilla extract to create a paste. Paint your horn and teardrop parts of the ears until golden. Leave to dry before placing the horn on the cake at a 45-degree angle. If needs
be cut down your skewer to size! Next pop on your ears - these should sit nicely in the buttercream but if they don't then try using some small cocktail sticks instead. - Next, take your leftover fondant and place into a food processor along with some activated charcoal until you reach a deep black colour. Roll out the black fondant and take a small circular cutter and cut 2 circles. Next, take the cutter and place it slightly below the top of the circles and cut to create an arch. Dampen the fondant and place on the cake gently, press down lightly to glue to the cake. To create more of a flick use a cocktail stick to angle up the sides Repeat the cutting process once more and this time slice
off the thinner ends of each arch then glue onto the outer corners of the eyes to create the lashes. And you are done!
*All cup measurements used are UK cup measurements and so 1 cup = 250ml, 1 tbsp=15ml, and 1 tsp=5ml.
** Please note that this recipe will require you to dehydrate your cake base for at least 10 hours and to soak your cashews overnight or for at least 6-8 hours for your buttercream and 2 hours for your cake base.


3 Comments
Raj - www.ThePrimalDesire.com
16th May 2019 at 10:09 pmThis looks incredible Georgie! I have a question for you… Do people not get upset when you call the recipe “paleo” in the title, even when you include cane sugar and dairy in the recipe?
greensofthestoneage
16th May 2019 at 10:14 pmHey Raj! Nah not really? Although there’s no dairy in this and I always provide a substitution – like this one uses xylitol as a sub for raw cane sugar. It’s a birthday cake so it’s not really something I class as ‘Paleo’ but I think all Paleo food is about the person’s take on it. Every now and then the Paleo Police pop up but it’s so rare!
Raj - www.ThePrimalDesire.com
16th May 2019 at 10:58 pmAlways curious about how people deal with the paleo police! I always tell people that I’m foodie first and paleo second. It’s almost weird when people are dogmatic about it, but I still shy away from using the term “paleo” if it has dairy, even if I give an alternative.