
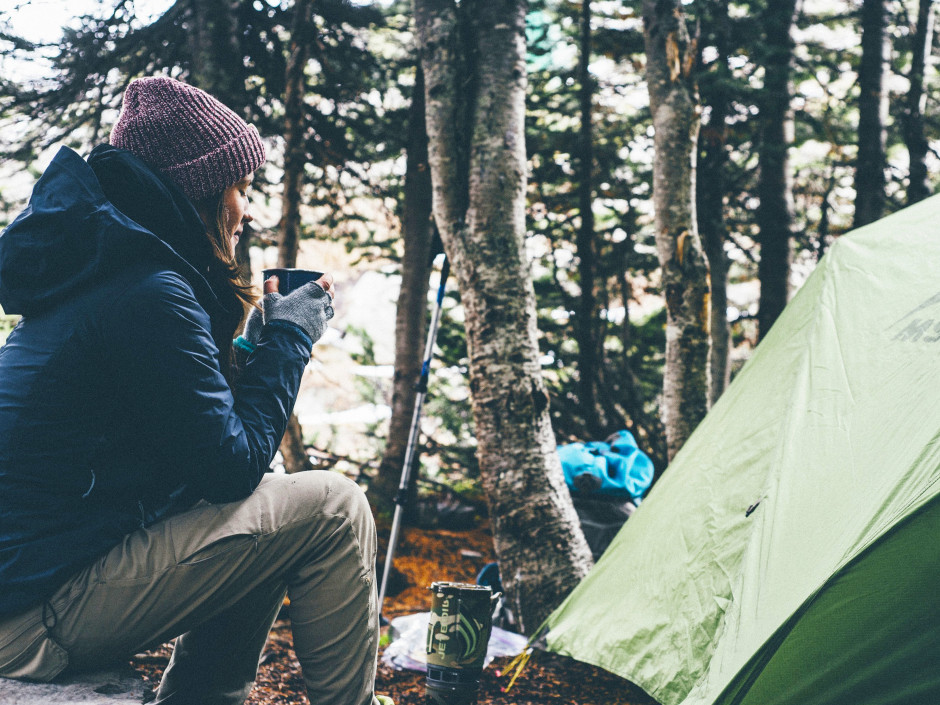
So recently I have been revisiting one of my childhood loves – camping. Since having my kids from the rather young age of 19, and being a single parent for the majority of this, I have been unable to go on holiday abroad or even within the UK itself, I could never even afford the initial set up costs for camping gear. But all of this has now thankfully changed and although my partner and I are short on cash we have slowly been building our camping gear over the years.
This weekend we went camping for the second time this year and it was the most amazing experience that I have ever had! Even though we were on a campsite, with the kids, and only staying for one night the experience of letting go of all technology and the pressures of busy modern life allowed me to breathe for the first time in, well, a long time! It left me feeling strangely calm and content, a feeling that I very rarely get to experience at the best of times.
If you haven’t been camping for a while or have never been just go ahead and take the plunge! I assure you that you won’t regret it!
These are my top tips for keeping it as Paleo as you can whilst camping – and yes there are recipes included! If you did come here for the marshmallow recipe and not the camping tips (shame on you) scroll down to the bottom!
So Here are my Top Paleo Camping Tips…
The majority of being able to keep your camping trip Paleo is down to prep – and not even as much as you may think.
Take the Right Equipment…
Ok this one probably sounds quite obvious but I thought that I would share a few of my favourite products with you:
- Jetboil Flash – Yes this might seem pricey at £105 but I guarantee that you will not regret it at all. This can boil 2 cups of water in 2 minutes, has a little indicator that changes colour on the side to let you know when the water has boiled, and has an insulation sleeve to prevent you from burning. It also comes with a stability tripod, a stove top adapter, and a lid with spout. The fuel cans are around £4 for the smaller one which slides inside the cup for compact storage or you can buy a canister double the size for £5.
- Jetboil Coffee Press – Yes if you love coffee as much as I do then this is worth investing in to go with your Jetboil. Fresh coffee without grains falling through – genius!
- Aerolatte Whisk – Totally worth getting for under £10 – this little bad boy froths up your hot bevvies and makes a mean cup of Bulletproof coffee!
- Vango Non-Stick Cooking Set – Everyone needs a little compact and light set of cooking pots and pans when they go camping, but non-stick is your best friend!
- Stanley Flask – This costs around £35 in most places but will stay with you for a lifetime. The Stanley flask is virtually indestructable and will keep the contents piping hot (or cold) for 24 hours. Just be sure to fill with boiling hot water and leave for 10-15 minutes before filling with your hot drinks or soups.
- Dr Bronner’s Organic Peppermint Castile Liquid Soap – Not quite equipment but this stuff will be your saving grace! You can wash your hair and body with this, you can wash your dishes, you can wash fruit and veg with it, and you can even brush your teeth with just two drops of the stuff! Just take caution when washing your face – place a few drops into a bowl of warm water and use a baby wipe to wash yourself all over with no need to rinse!
- Coconut Oil – Take a small tupperware pot with some coconut oil and use it to cook, moisturise, remove your make-up, or add to hot drinks.
- First Aid Kit – I’ve left this down to you to look through as a first aid kit is a very personal thing and your needs will differ dependent upon who you are camping with.
- Wet Wipes – Yes wet wipes might seem a bit daft but they are so versatile for cleaning yourself and your dishes. I can’t live without them. Try and find a good organic brand!
- Sleeping Gear – Self inflating roll mats and normal roll mat to place under, self inflating pillows (optional), a good brand of mummy sleeping bag, thermal hat, thermal base layers. Yes even in summer it is frickin’ cold out there! If you have kids that don’t yet fit in a sleeping bag pack a Grobag type sleeping bag, thermal PJ’s, a furry onesie, vests, and bring their duvet and pillow too! I co-sleep when camping so I can check on the bubba but some people like to take a travel cot and line it with a roll mat.
- Other Items – A tent (obviously), lightweight metal camping cups, cutlery, and bowls, plates etc., a torch, maybe some battery operated rope lights to make it feel like home, sit mats, folding table (optional), windbreaker (optional), matches/lighter, bottled water in case your campsite doesn’t have a supply of drinking water, glow sticks, playing cards and other portable games. Depending upon where you are going and what activities you are partaking in you might want to bring a waterproof coat, waterproof shoes, hiking socks, and hiking boots.
Pack Frozen and Tinned Foods
Pack frozen vegetables into tupperware, place in your cool box with some ice packs and by the time you need to cook them the vegetables will have thawed out staying fresh. This will minimise your cooking time and therefore use less gas! Alternatively pack tinned vegetables – these are not my first or favourite choice but it definitely makes for convenience and you can get quite a lot of decent tinned veg these days if you know where to look. Always buy tinned vegetables in water or olive oil and not brine! Again you can do the same with fruits but make sure that they are in juice and not syrup if tinned!
Another thing that I found useful were cartons of chopped tomatoes – you can buy then with garlic and chilli and all sorts of things in them and they taste great cold!
Marinade or Pre-season your Protein: Boil in the Bag or BBQ!
Yes that is right! This doesn’t have to be complex or overly gourmet – maybe just add a slice of butter, a sprinkle of sea salt, and a crushed clove of garlic or some root ginger, garlic, salt, and raw honey ground into paste before wrapping your favourite meat or fish into a tin foil pouch. When wrapping your meat or fish be sure that the shiny side is on the inside as this will keep the heat locked into the pouch cooking it faster.

My prepped salmon fillet ready to ‘boil in the bag’!
To make a foil pouch that can sustain being boiled or placed over a BBQ with minimal leakage make a large rectangle of foil and fold in half, place your fish/meat on the inside and fold in the sides first being sure to make a tight seal but not so tight that there isn’t enough room for manoeuvre. Repeat the process for the top of the pouch. Place into the fridge overnight in a tupperware box and when you are ready to go pack between some ice packs in a cool box! When cooking the pouches boil one by one or BBQ all pouches for 8-10 minutes until cooked through. If you are using a BBQ or firepit then you may want to just give them a little smoke over the fire once cooked for added flavour!
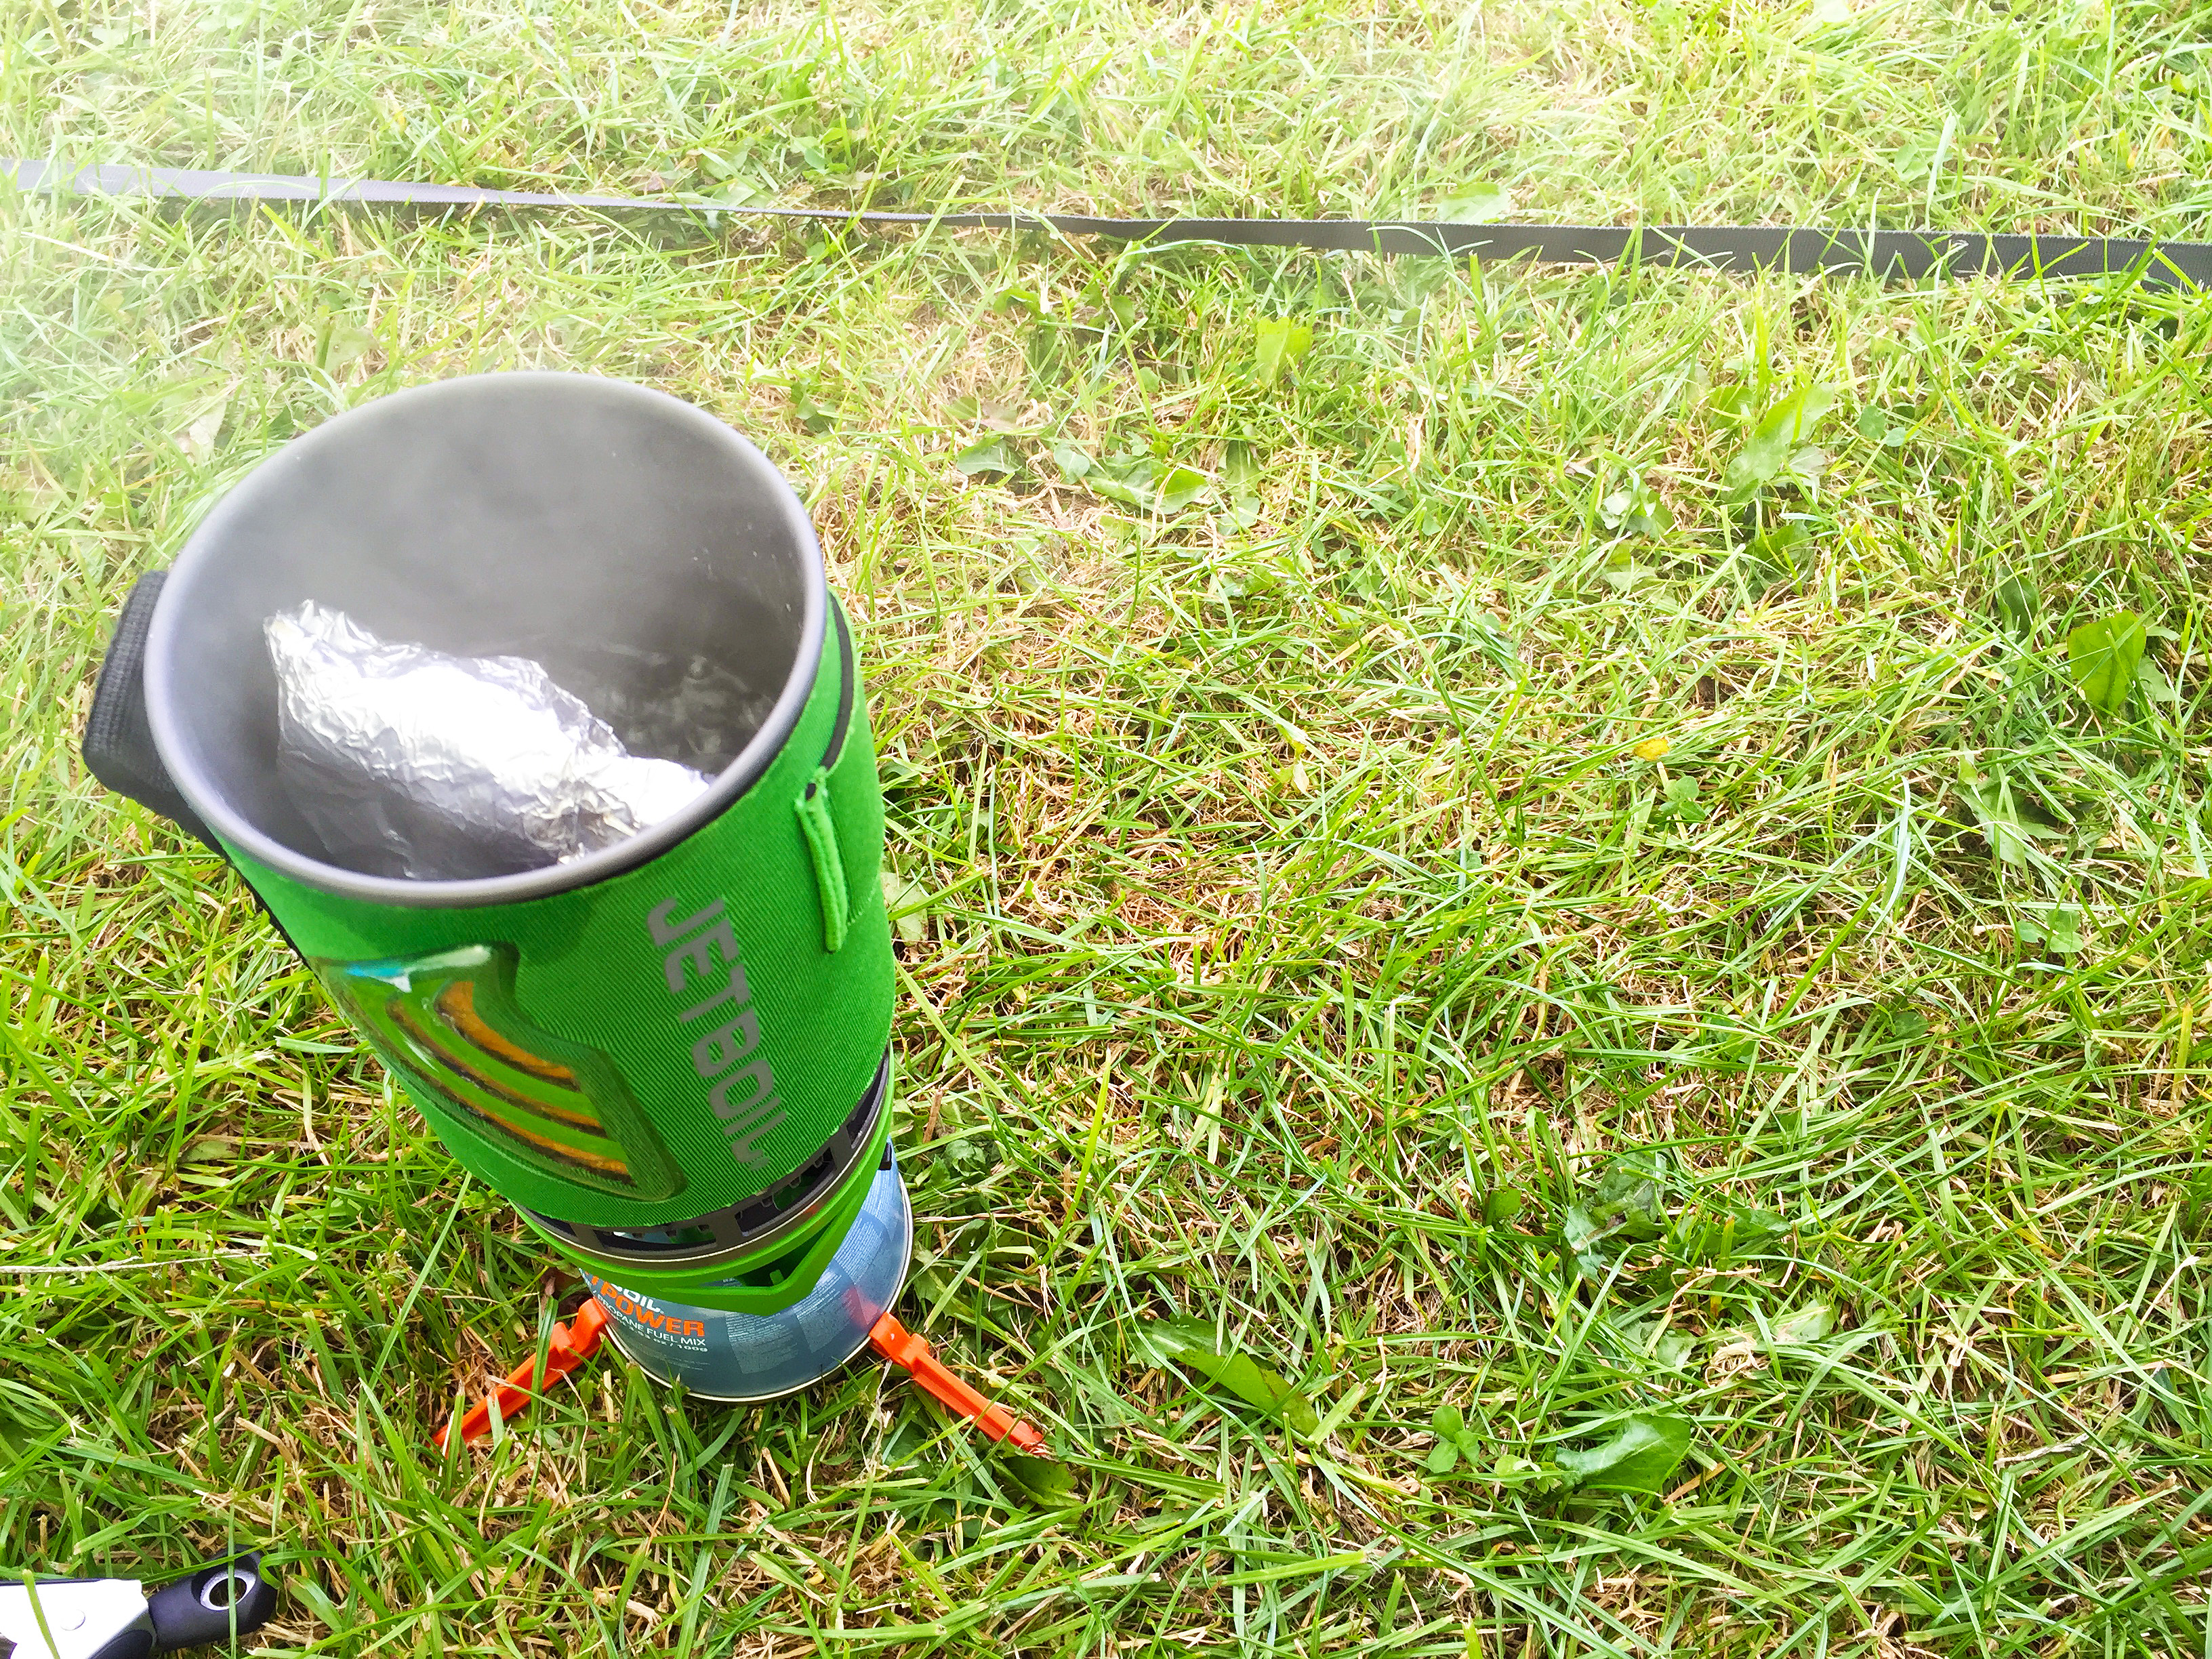
My salmon fillet boiling away in the Jetboil!
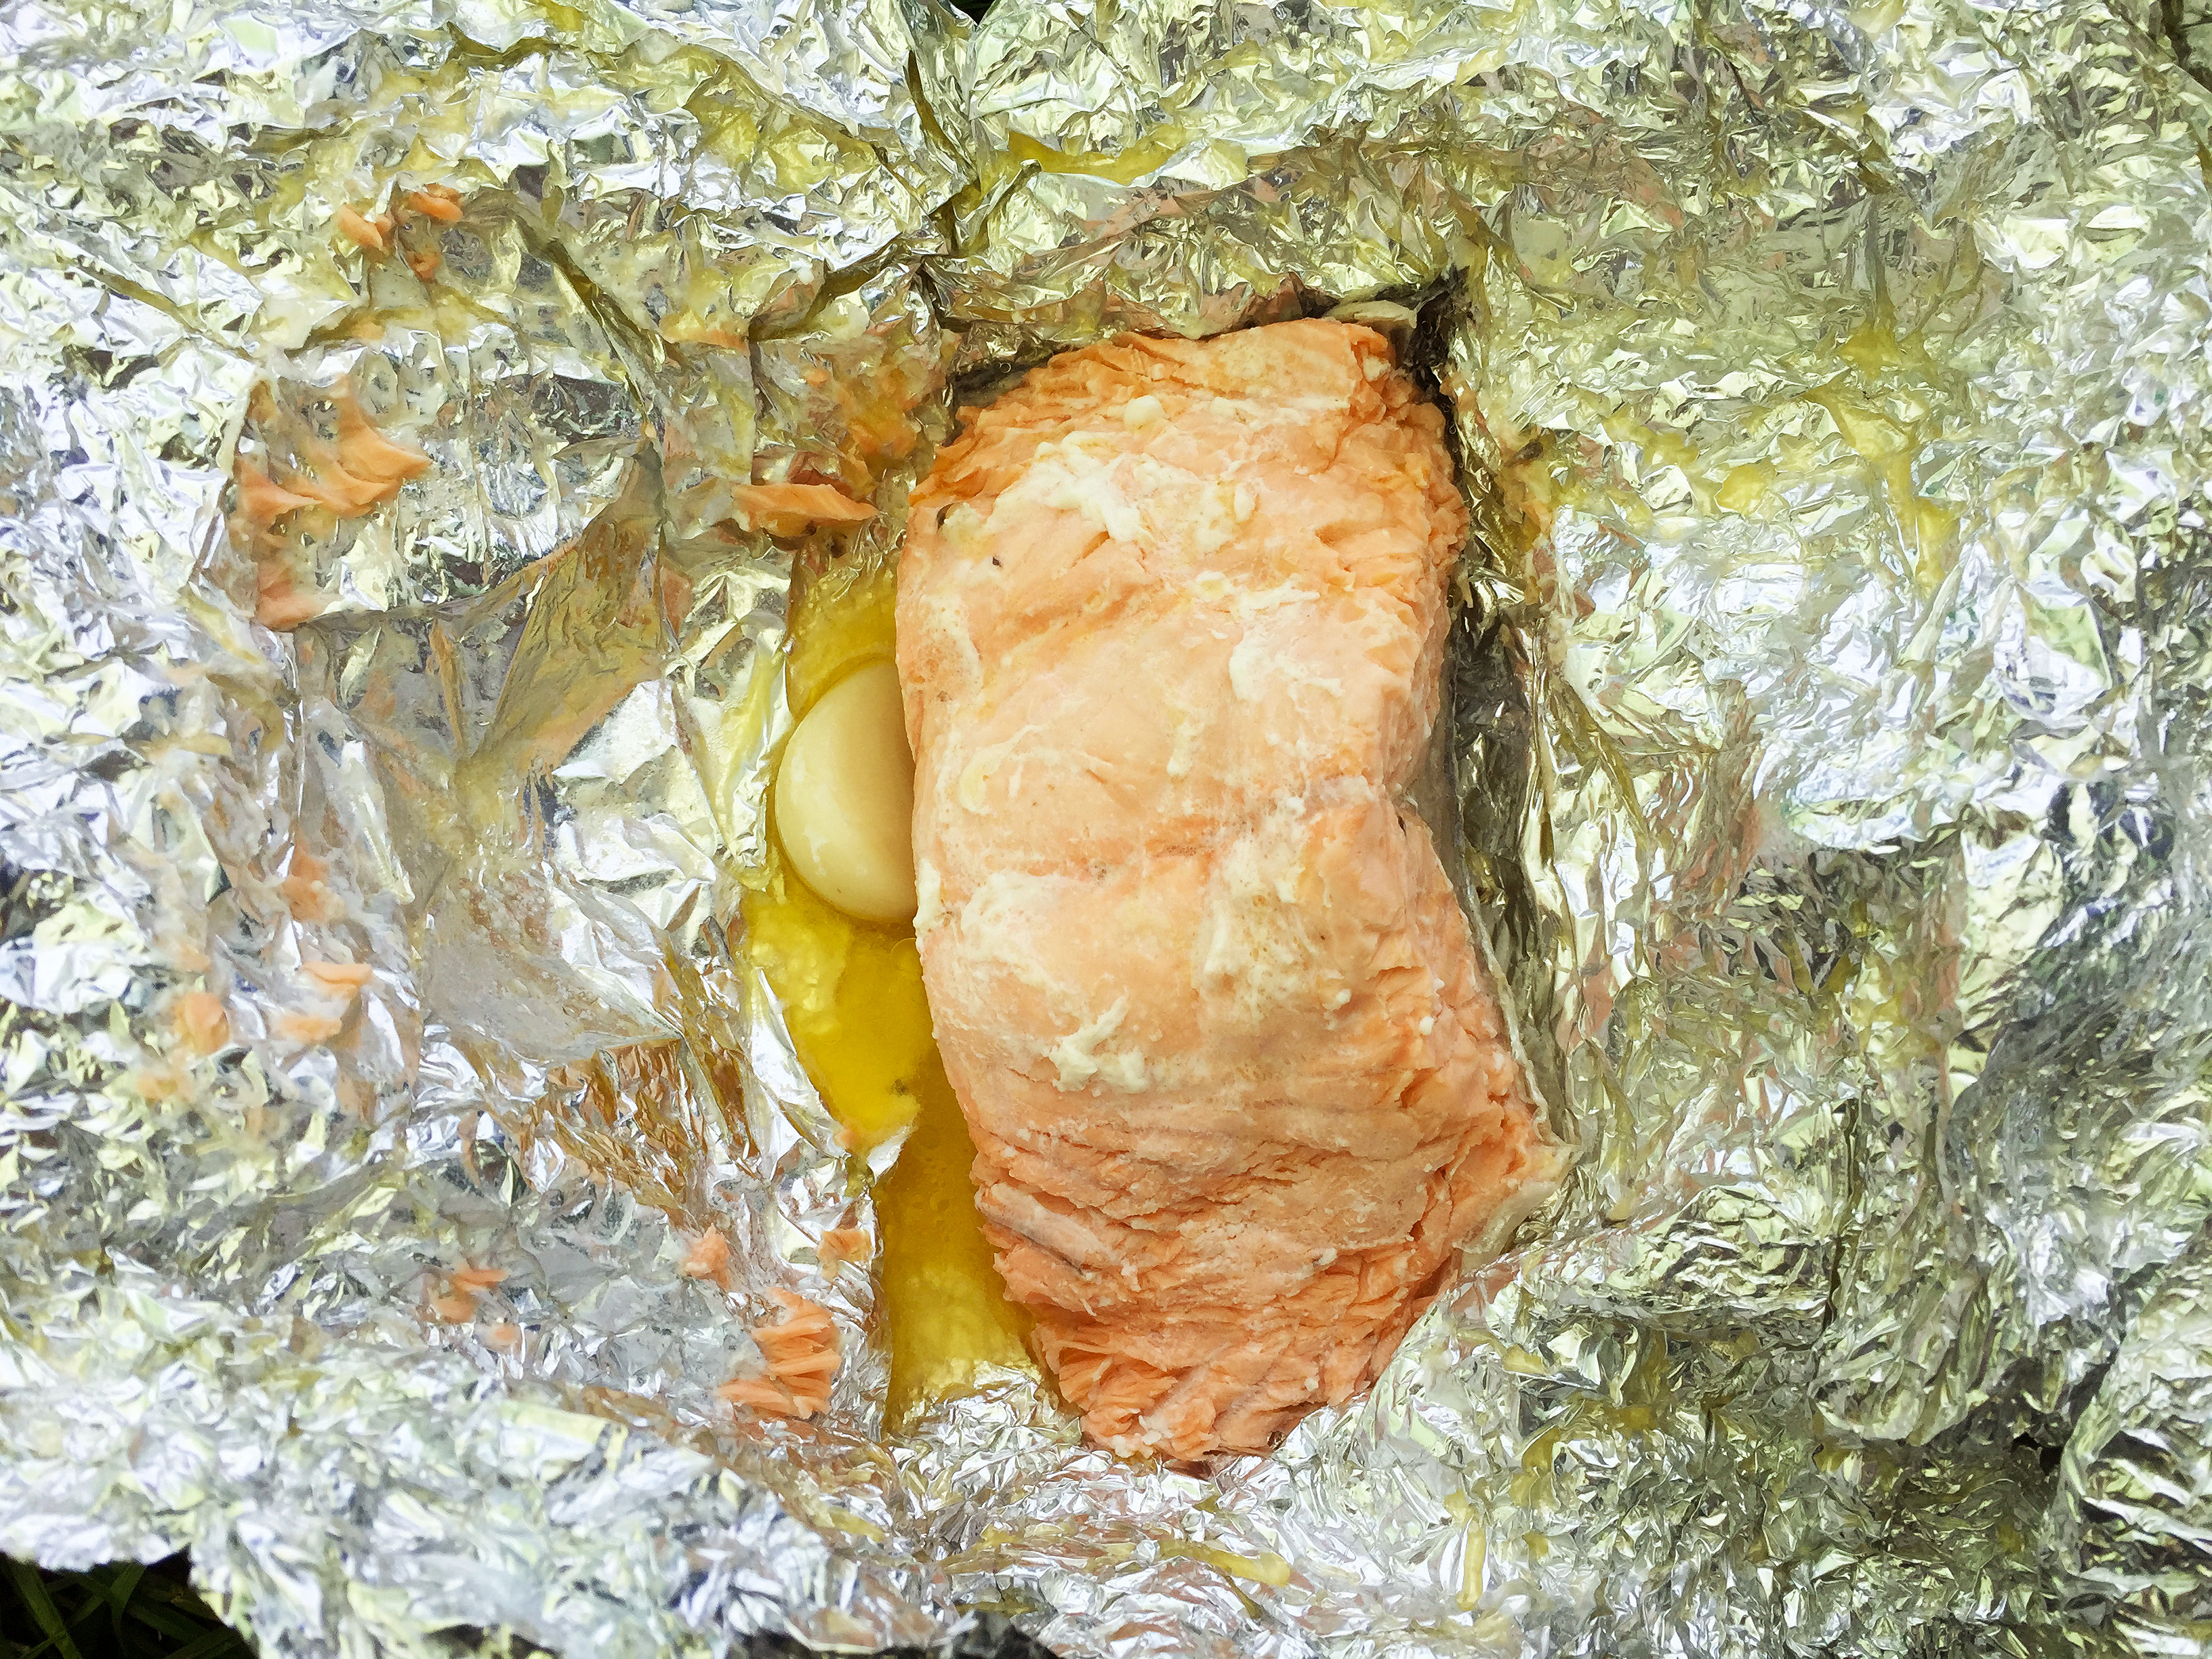
Take a look at my gorgeous salmon fillet (no it wasn’t wild 🙁 ) and tell me that doesn’t look delicious?!
If you’re vegetarian then definitely pack some halloumi cheese as this is perfect on the BBQ or even cooked in some chopped tomatoes!
Eggs
Yes eggs are definitely one of the most versatile foods ever and great for camping! You can pre-boil some eggs to take or you can bring them raw to cook! Keep them packed in an egg box in your cool box and be sure to wrap them in bubble wrap for safe transportation. Boil, scramble, fry, or make into an omelette the choice is yours!
Go Nuts!
Don’t forget to pack some nuts and seeds as these will be a vital snack packed full of fats and proteins for when you are on the go. You don’t have to go plain though – take two handfuls of nuts and one handful of seeds, place onto a lined baking tray and bake on 100C until beautifully browned. Remove from the oven and stir in 1 tbsp of your favourite spice mix – this could be chai or plain garam masala, add 1/8 tsp Himalayan pink salt, and 1 tbsp maple syrup and stir. Place back into the oven for 2-3 minutes. Remove, leave to cool for a couple of minutes, and then transfer to a small airtight container. Be sure to leave the lid off until the nuts have cooled and then seal! Dried fruit can make a great addition but I try to stay away from it as it can be a bit lethal! If you do opt for dry fruit try and keep it minimal so around 1 tbsp of finely chopped dried fruit. Coconut and cacao nibs are also a great addition.
Make a Brew!
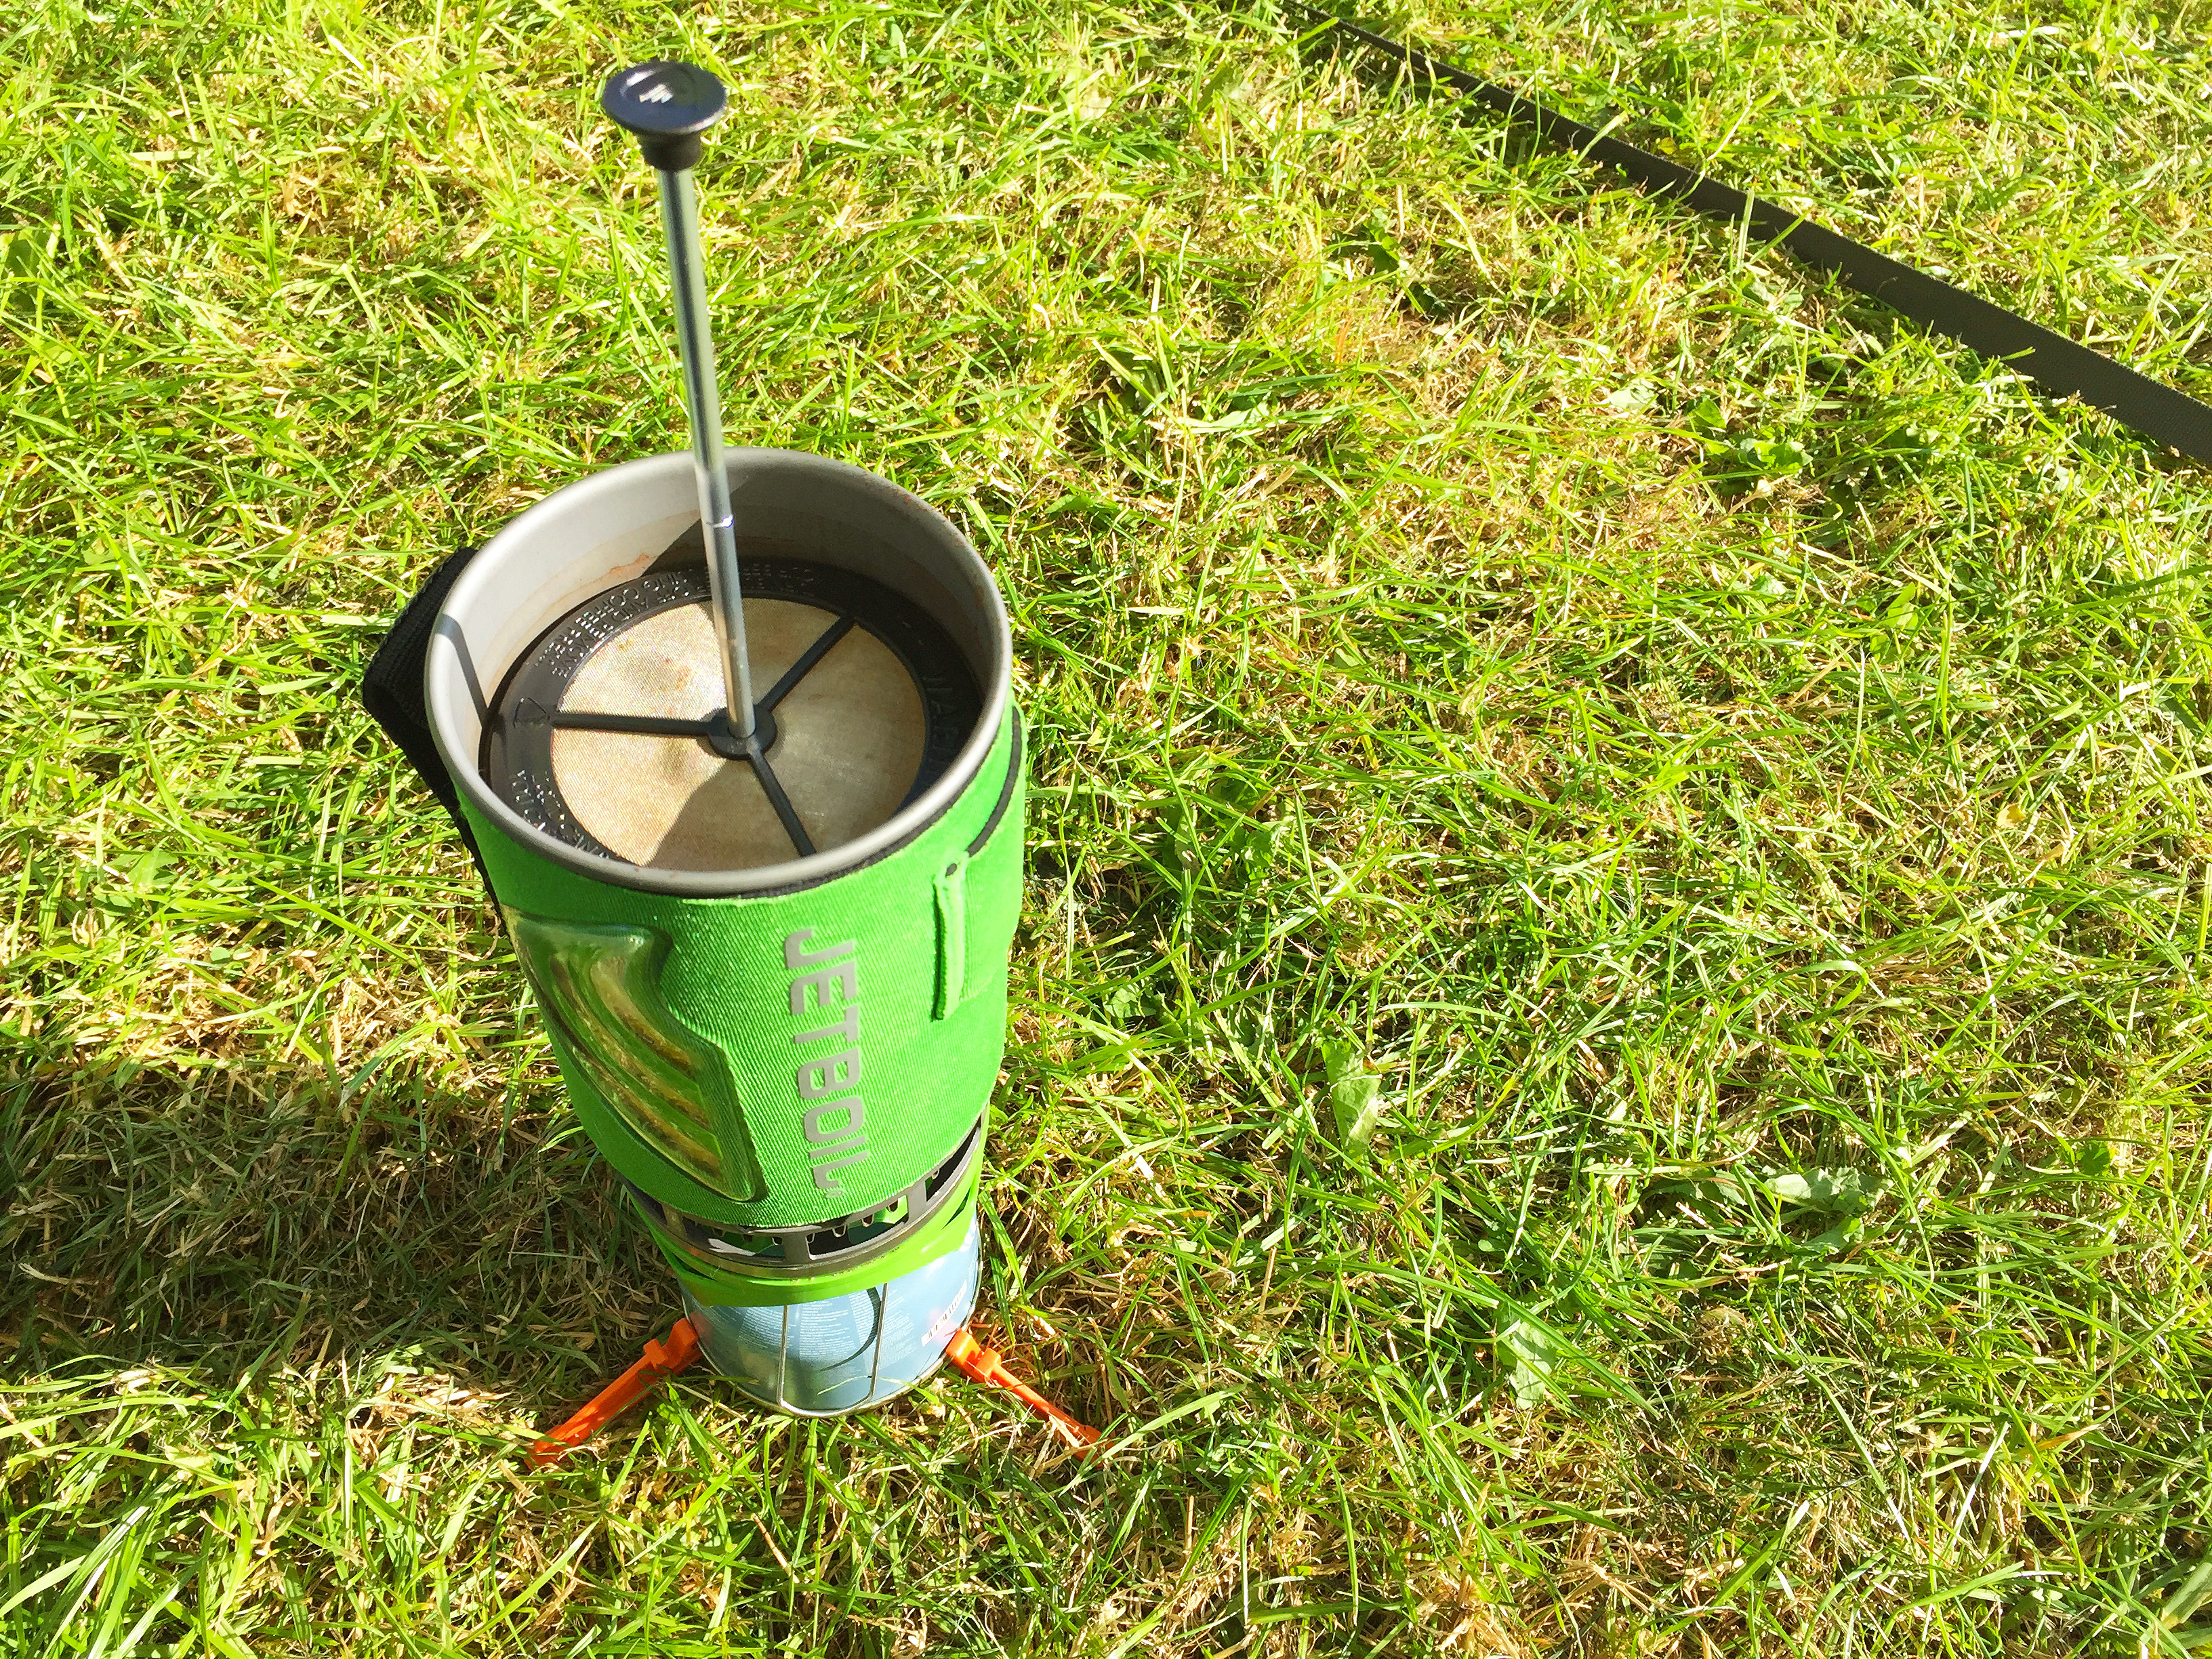
Brewing my morning cup of coffee in my Jetboil using the coffee press accessory!
Be sure to pack yourself some herbal tea bags, matcha powder, or pre-make some of your own hot chocolate sachets using 1 heaped tsp of cacao powder, 1-2 tbsp coconut milk powder, and 1/8 tsp pure stevia powder or 1 tsp coconut sugar. If like me you can’t live without your Bulletproof coffee then pack portions of raw grass-fed butter with coconut oil wrapped in tin foil in your cool box. I used the Jetboil and the coffee press accessory to brew my coffee and then whizzed it all up with my Aerolatte whisk. Keeping warm is key and there is nothing better than gazing up at the starts at night drinking a nice cuppa watching the stars!
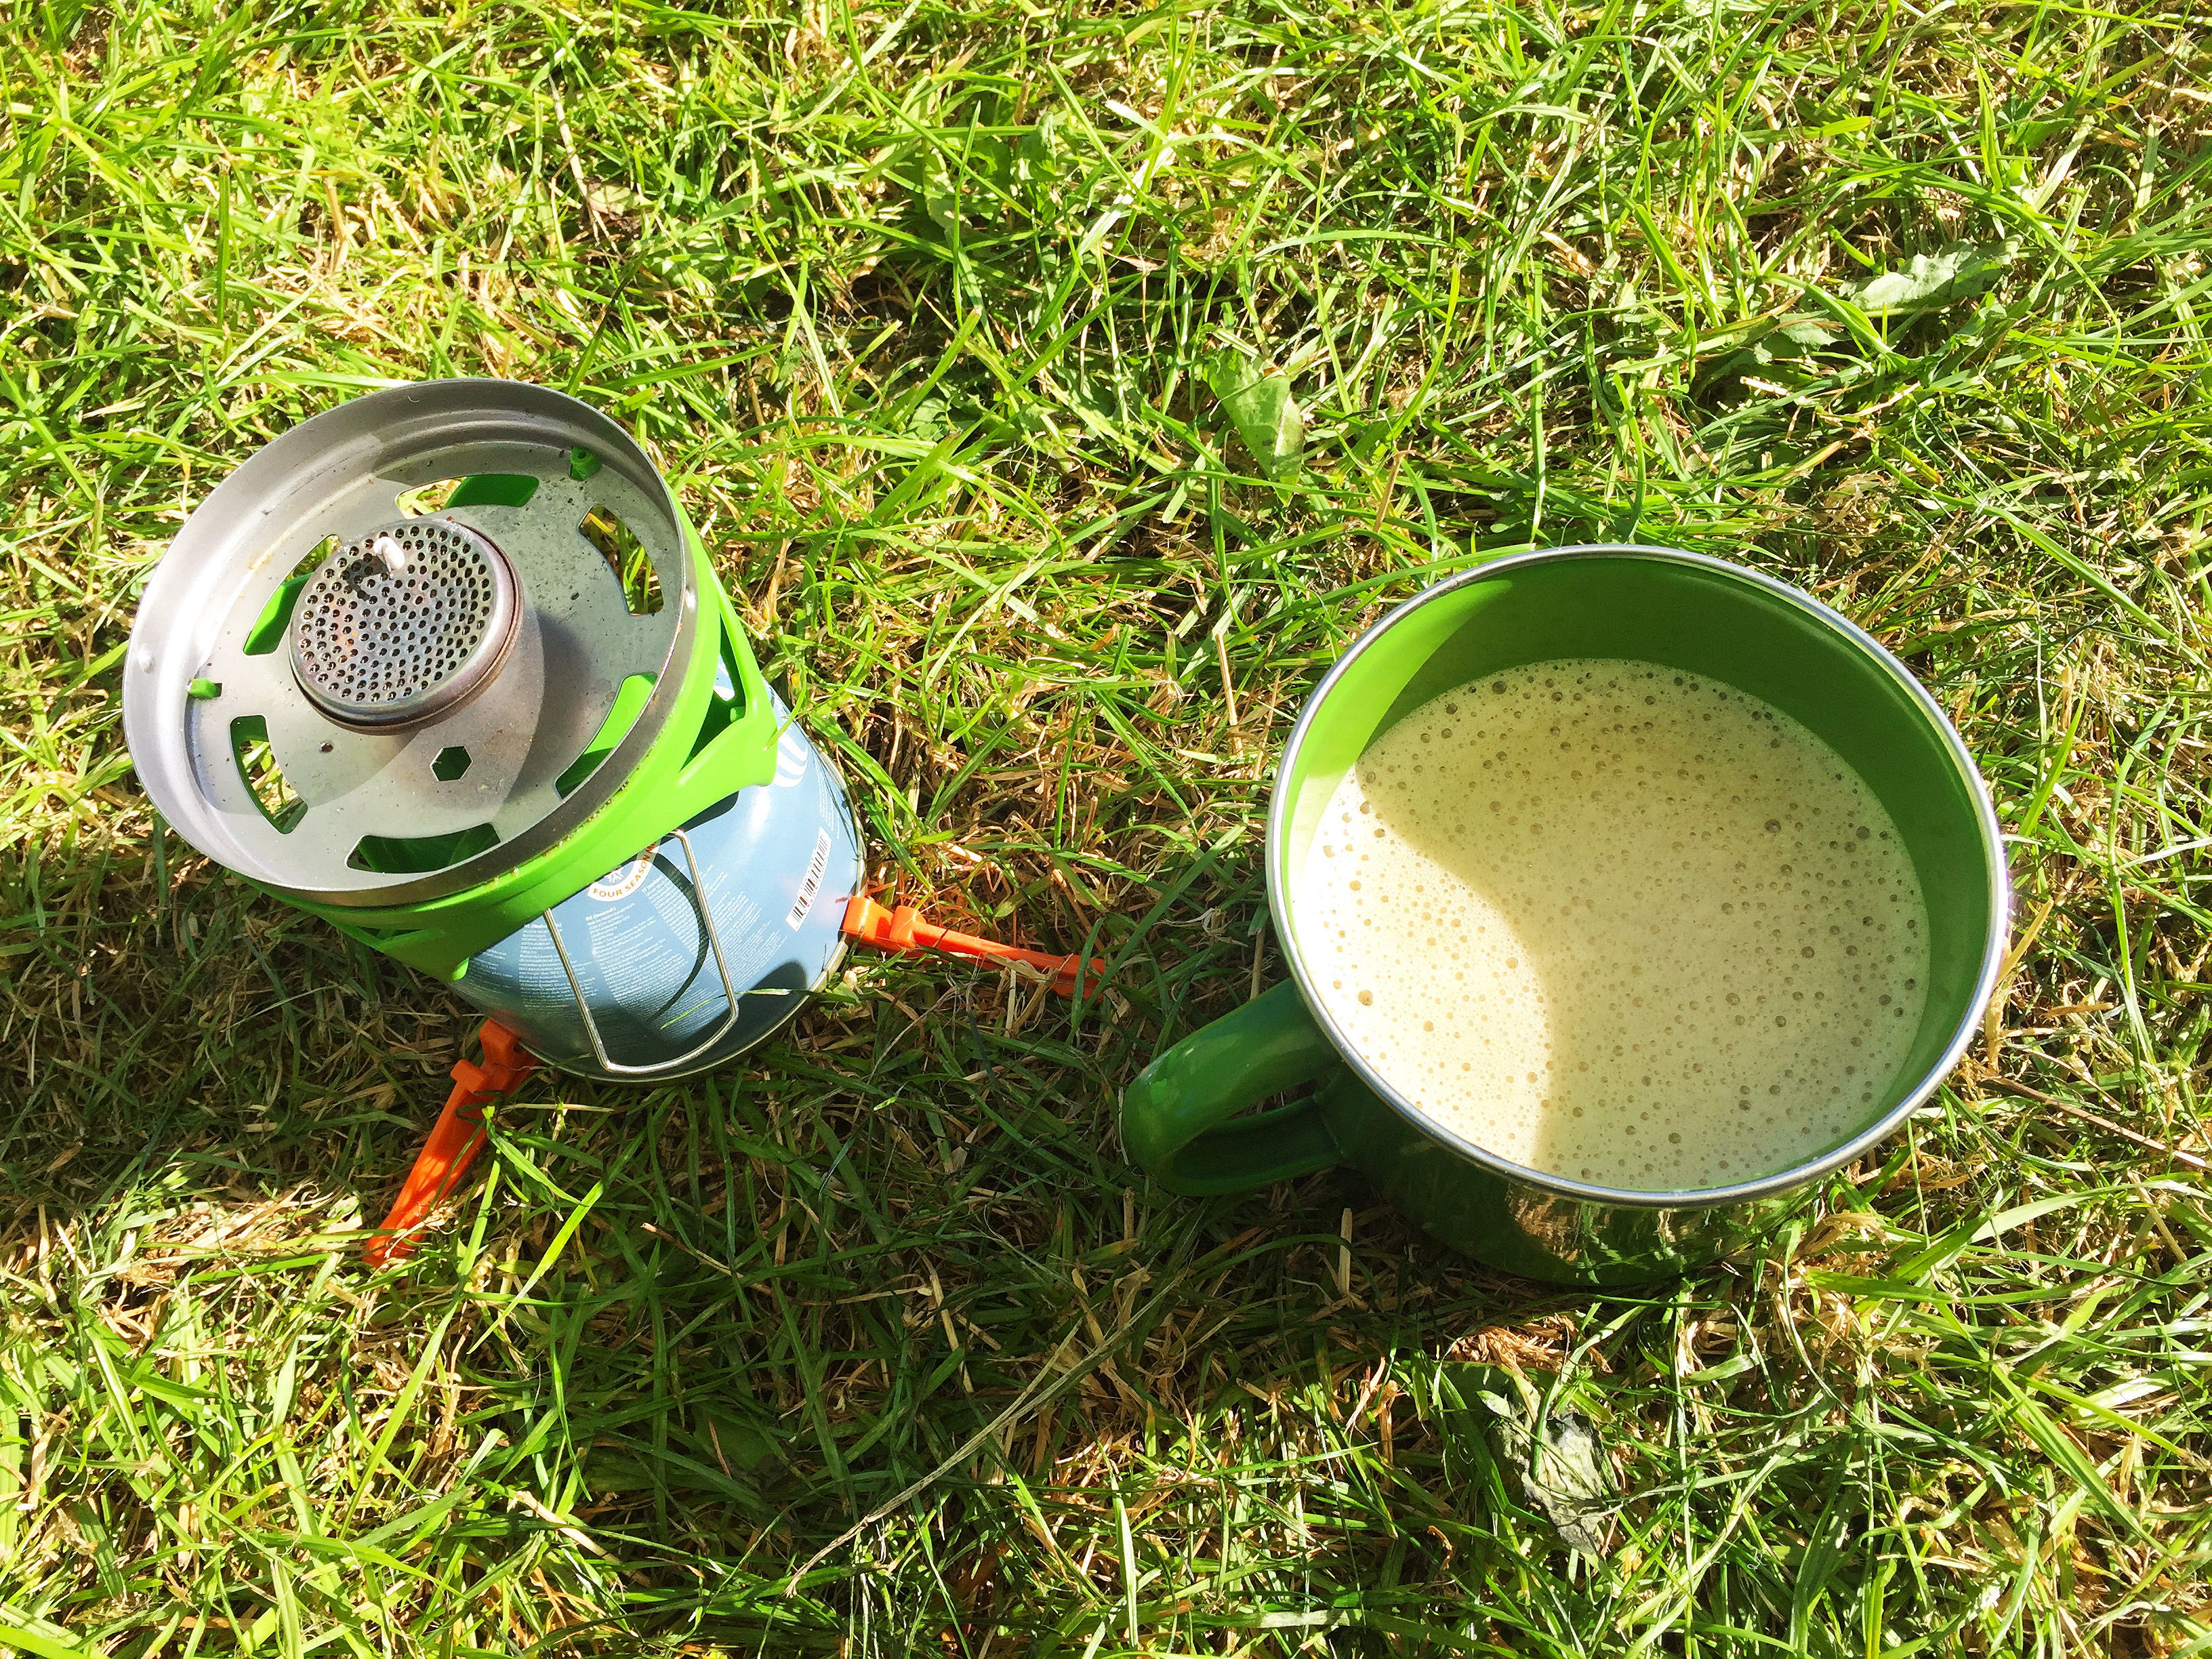
My morning Bulletproof coffee!
Relax and Have Fun!
Get to your campsite early, check the weather before going, and pitch your tent, and organise your things. Get it all out of the way and have a plan of action so you keep your stress levels down! Camping isn’t supposed to be glamorous so let go of your Paleo preconceptions and really do get back to basics. Forget about the technology that infiltrates your life on a daily basis and get moving! Go camping by the seaside, near the moors, climb a mountain, swing from some trees in the woods, or maybe just do some cartwheels and handstands on your campsite. Either way just let your hair down! If you just want to sit inside your tent and breathe in the fresh air then by all means just do that!

Anya having fun at the seaside!
If you are going camping with your kiddies let them run around freely within your site, they will be safe I promise! They won’t want to go to sleep until it is dark so just sit back and let them have fun. Pack some sparklers to play with at night time, get them into their onesies, toast some marshmallows, have a hot chocolate, and then just play some silly word games until they are pooped! The fresh air really does knock them out once they finally get to sleep so expect to be up before they are in the morning!
Practice Grounding Before Bedtime!
Grounding (also known as earthing) is where you place your bare feet on the grass before you go to sleep. This equalises your energy levels to that of the earth itself – it’s not likely that many of us get the opportunity to do this at home so give it a go and see for yourself how great it is! If you want to read more about grounding then click here.
And Lastly… Treat Yourself!
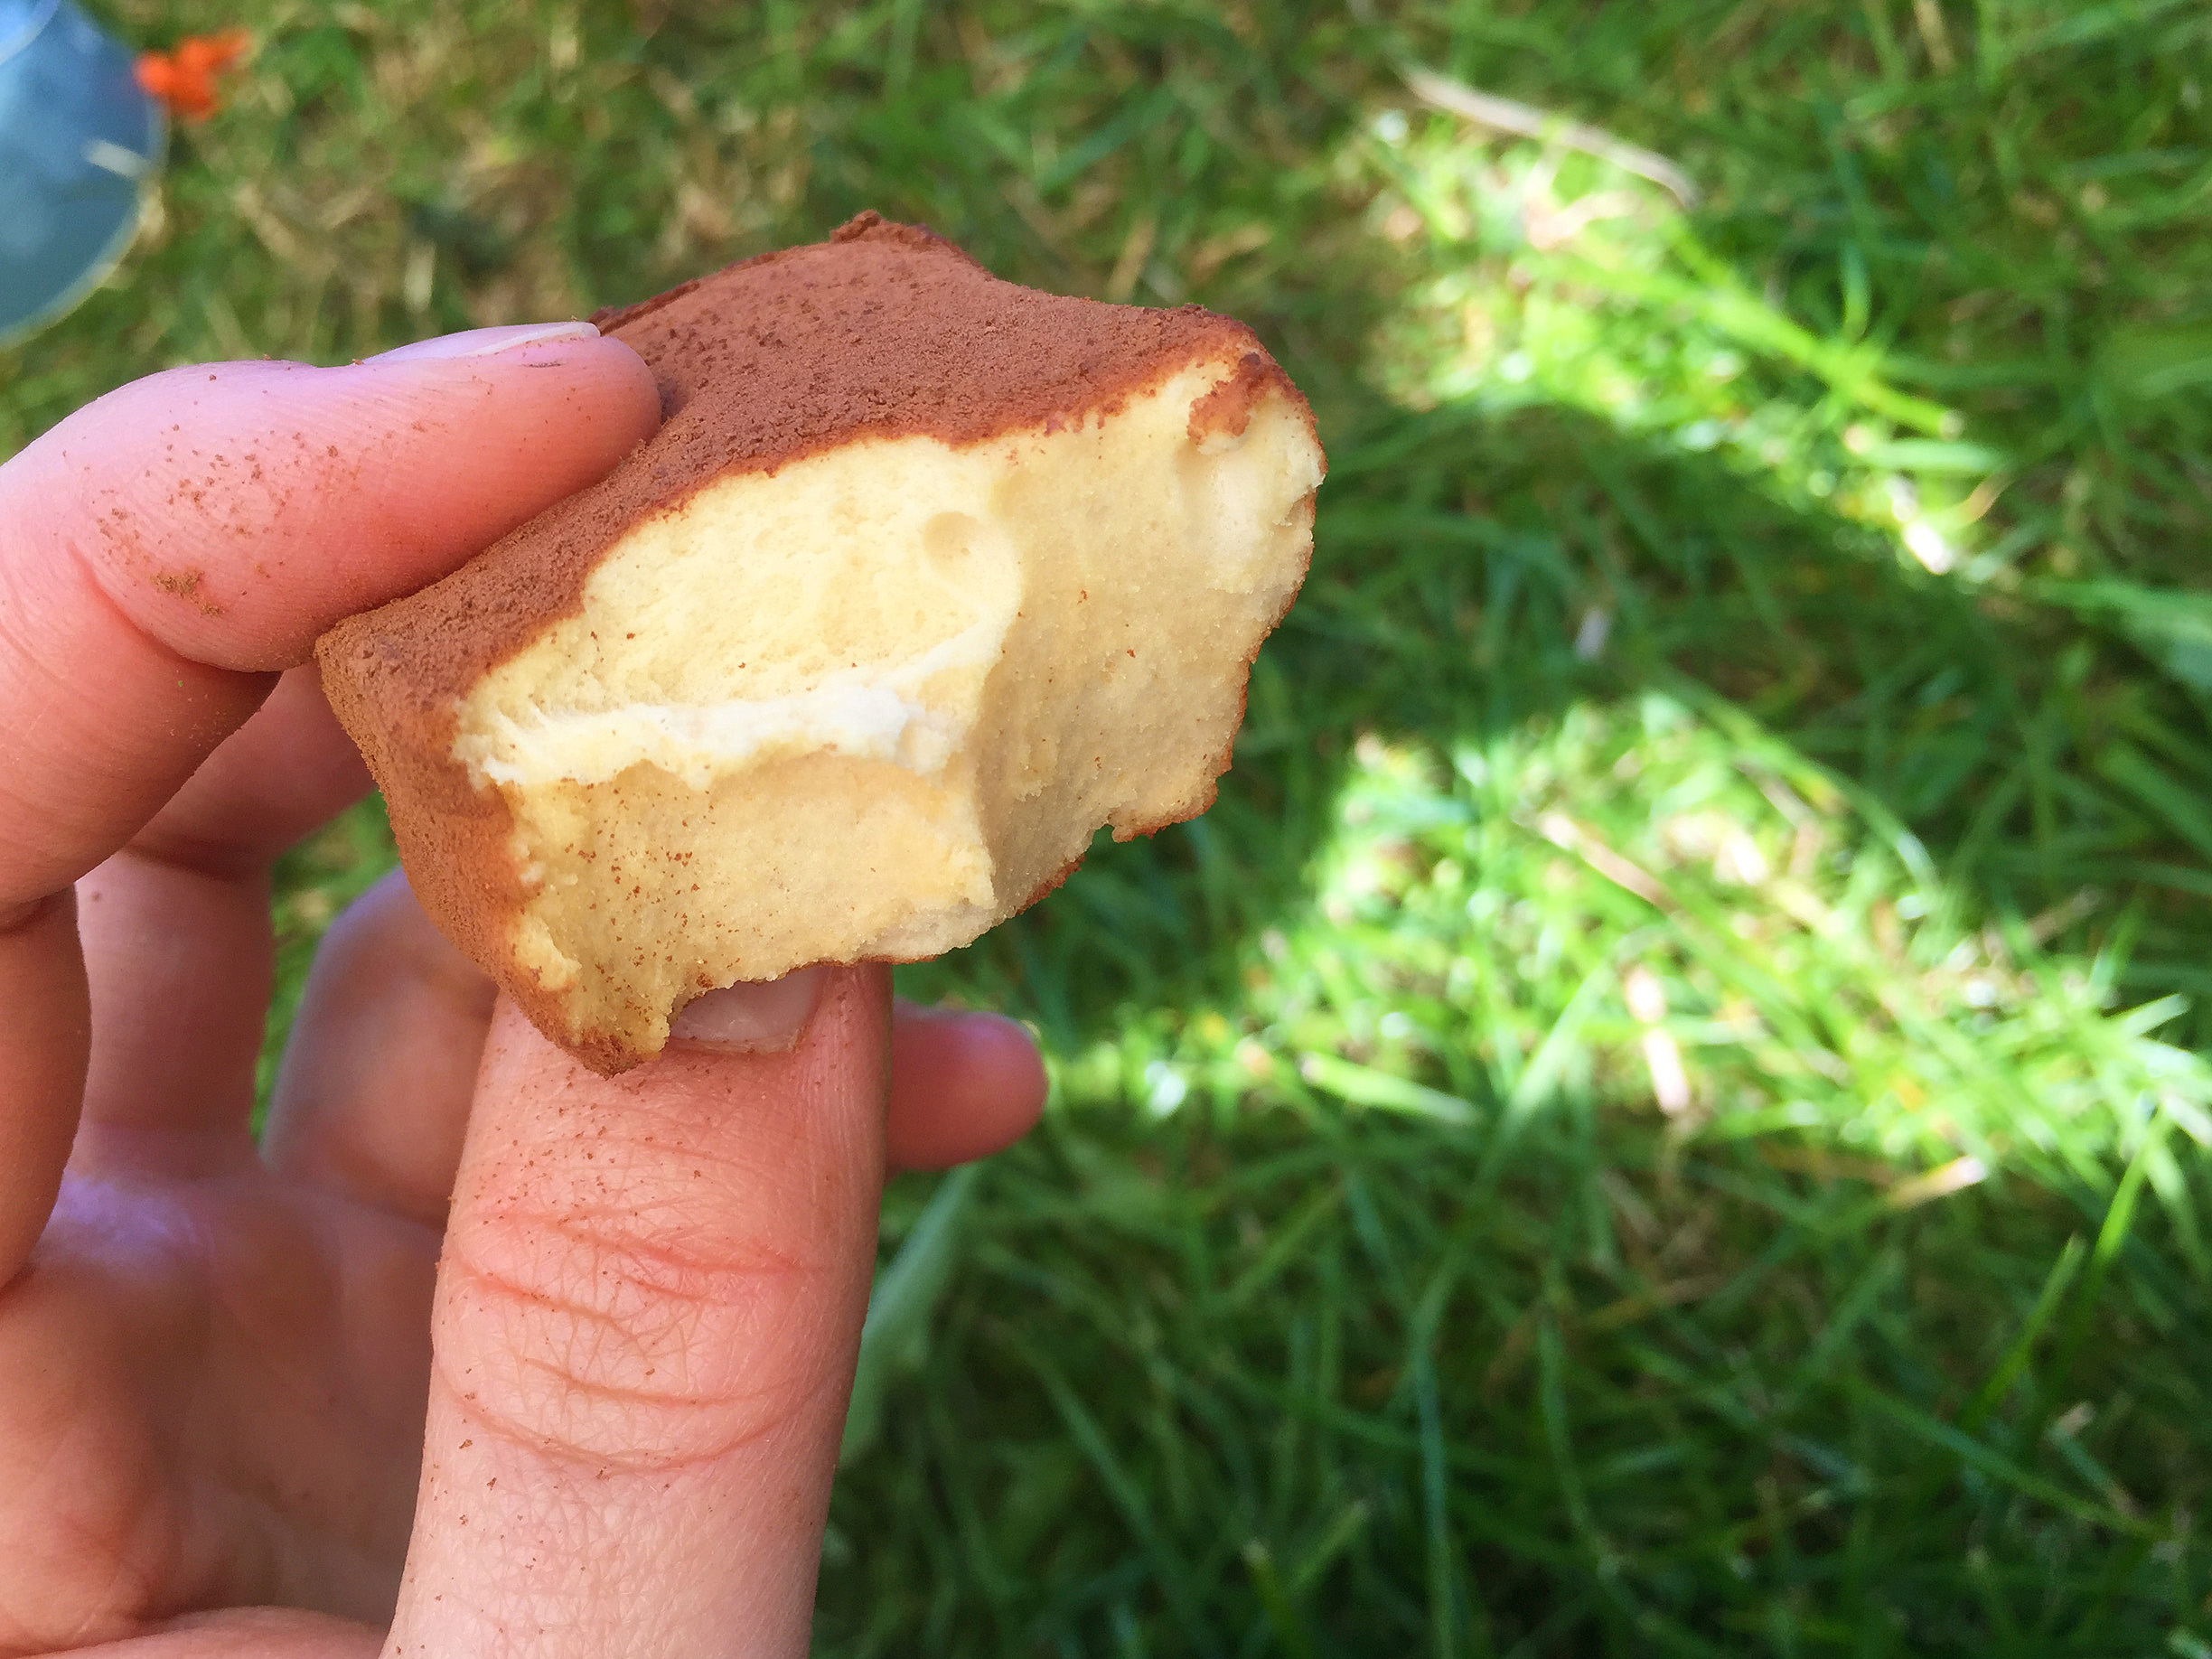
No camping trip is complete without some marshmallows but don’t worry you can make your own and they don’t have to be full of sugar! Most Paleo marshmallow recipes that I have seen have been so full of sugar (although the good unprocessed kind) and I don’t feel that this is so necessary. I came up with a lower sugar version (in fact half the amount of sugar than any Paleo recipe I have seen yet) for my trip and they toasted fabulously but were also great in hot chocolates and a Bulletproof coffee of course.
Because I am super nice and everything here is the recipe!
Paleo Cacao & Cinnamon Dusted Vanilla Marshmallows
These Paleo Marshmallows have half the amount of sugar that you’ll find in other Paleo recipes on the net and are also as fluffy as a Flump! Rolled in cacao powder and cinnamon these will be the highlight of any camping trip! (I am currently figuring out a way to veganise these bad boys so keep your eyes peeled people!).
Makes: Anywhere from 20-30 marshmallows (depending upon how large you cut them)
Preparation Time: 30-40 minutes
Cooking Time: 30 minutes
Setting Time: 2 hours
Ingredients:
For the bloom:
1/2 cup warm water
4 tbsp grass-fed gelatin
For the marshmallows:
1/2 cup water
1/2 cup raw honey
10 drops NuNaturals NuStevia Vanilla (Alcohol Free)
Pinch fine Himalayan pink salt
2 egg whites
For the dust:
4-5 tbsp cacao powder
1 tbsp cinnamon
Method:
- Start by making your gelatin bloom – combine 1/2 cup of warm water with 4 tbsp in a small bowl. Be sure to gradually sprinkle the gelatin in and whisk vigorously as you go along. Don’t worry too much if you get any lumps as these will dissolve once the syrup is poured on.
- Lightly oil a shallow square 20cm cake tin or glass dish. Put a couple of tablespoons of cacao powder into the tin/dish and cover with cling film. Shake the cacao powder around until all of the sides are evenly coated. Place the dish to one side.
- In a small pan add your water and raw honey. Place on a low heat and stir occasionally until the honey has fully dissolved.
- Turn up to a medium heat and bring the syrup to a boil. Once boiling place in your sugar thermometer, if you have one that is, if not don’t worry I will tell you how to continue without one! You will need to get your syrup to 122C-130C which is known as the hard ball stage. And it pretty much is what it sounds like. They syrup will become solid when cold. If you do not own a sugar thermometer get an ice cold cup of water (or frozen metal spoon) at the ready and periodically drop a few drops of the syrup in. Check the consistency between your fingers. It will be at the hard ball stage when it forms & holds a solid shape in the water and can only be squashed between your fingers. It shouldn’t be very malleable though. If it is, it is likely to still be at the ‘soft ball’ stage. The syrup should be quite thick and ropey when dropped from a spoon.
- Whilst your syrup is boiling begin to whisk your egg whites using an electric hand mixer or food mixer. Whisk until they form hard, stiff peaks that when you tip the bowl over your head will not fall on top of you! Be sure to use a fairly large mixing bowl as marshmallows expand fast!
- Once your syrup is at the hard ball stage add your NuStevia drops and Himalayan pink salt and stir. Pour in your gelatin bloom to the syrup. Stir/whisk until the gelatin has fully dissolved.
- Switch your mixer on to a low setting and gently pour in your syrup. If using an electric hand mixer get a helper to pour in the syrup or pour small quantities at a time.
- Mix until the mixture becomes incredibly thick. When you lift up your beaters/whisks the mix should hold to them before forming a thick ribbon which falls back down into the mixture. It will be very thick but only just at a pourable point. I found that using an electric hand mixer this took about 20-30 minutes.
- Once the mixture is ready pour it into your dusted tin or dish. Leave to set at room temperature for around 20 minutes and then place in the fridge for 2 hours or until fully set. It should be easy to ‘peel’ away from the sides when ready.
- When the marshmallow has set carefully peel away from the sides and gently lift with a knife. Turn your tin over and release the marshmallow. Using a large oiled and dusted sharp knife begin to cut your marshmallow into strips lengthways. Then cut the strips into cubes.
- Mix together 2-3 tbsp cacao powder with 1 tbsp of cinnamon into a small bowl. Roll each marshmallow in the mixture until fully dusted.
- Store your marshmallows in an airtight container with the remaining dusting. Give the marshmallows a good shake around to dust them evenly. And there you have it – your very own Paleo Marshmallows!


1 Comment
Chris
11th February 2016 at 11:34 pmWe do a lot of camping, and one thing we often do is make up a double boiler using a pan of water at the bottom with the top pan acting as an oven. In our pre paleo days it worked great for warming up chilled pies from the supermarket but is also great for pre cooked chicken portions etc. It is like having an oven with you. Also good if you are making a cooked breakfast to keep the first things you have cooked warm until everything else is ready.